How to view and operate the Japan Dashboard (Economic, Fiscal, Population and Livelihood Dashboard)
Contents
- Look at the indicator data
- Looking at a single indicator by prefecture
- Look at the relationship between two indicators
- Arranging the four indicators
- Copy and use data for one indicator
- Bulk download multiple metrics
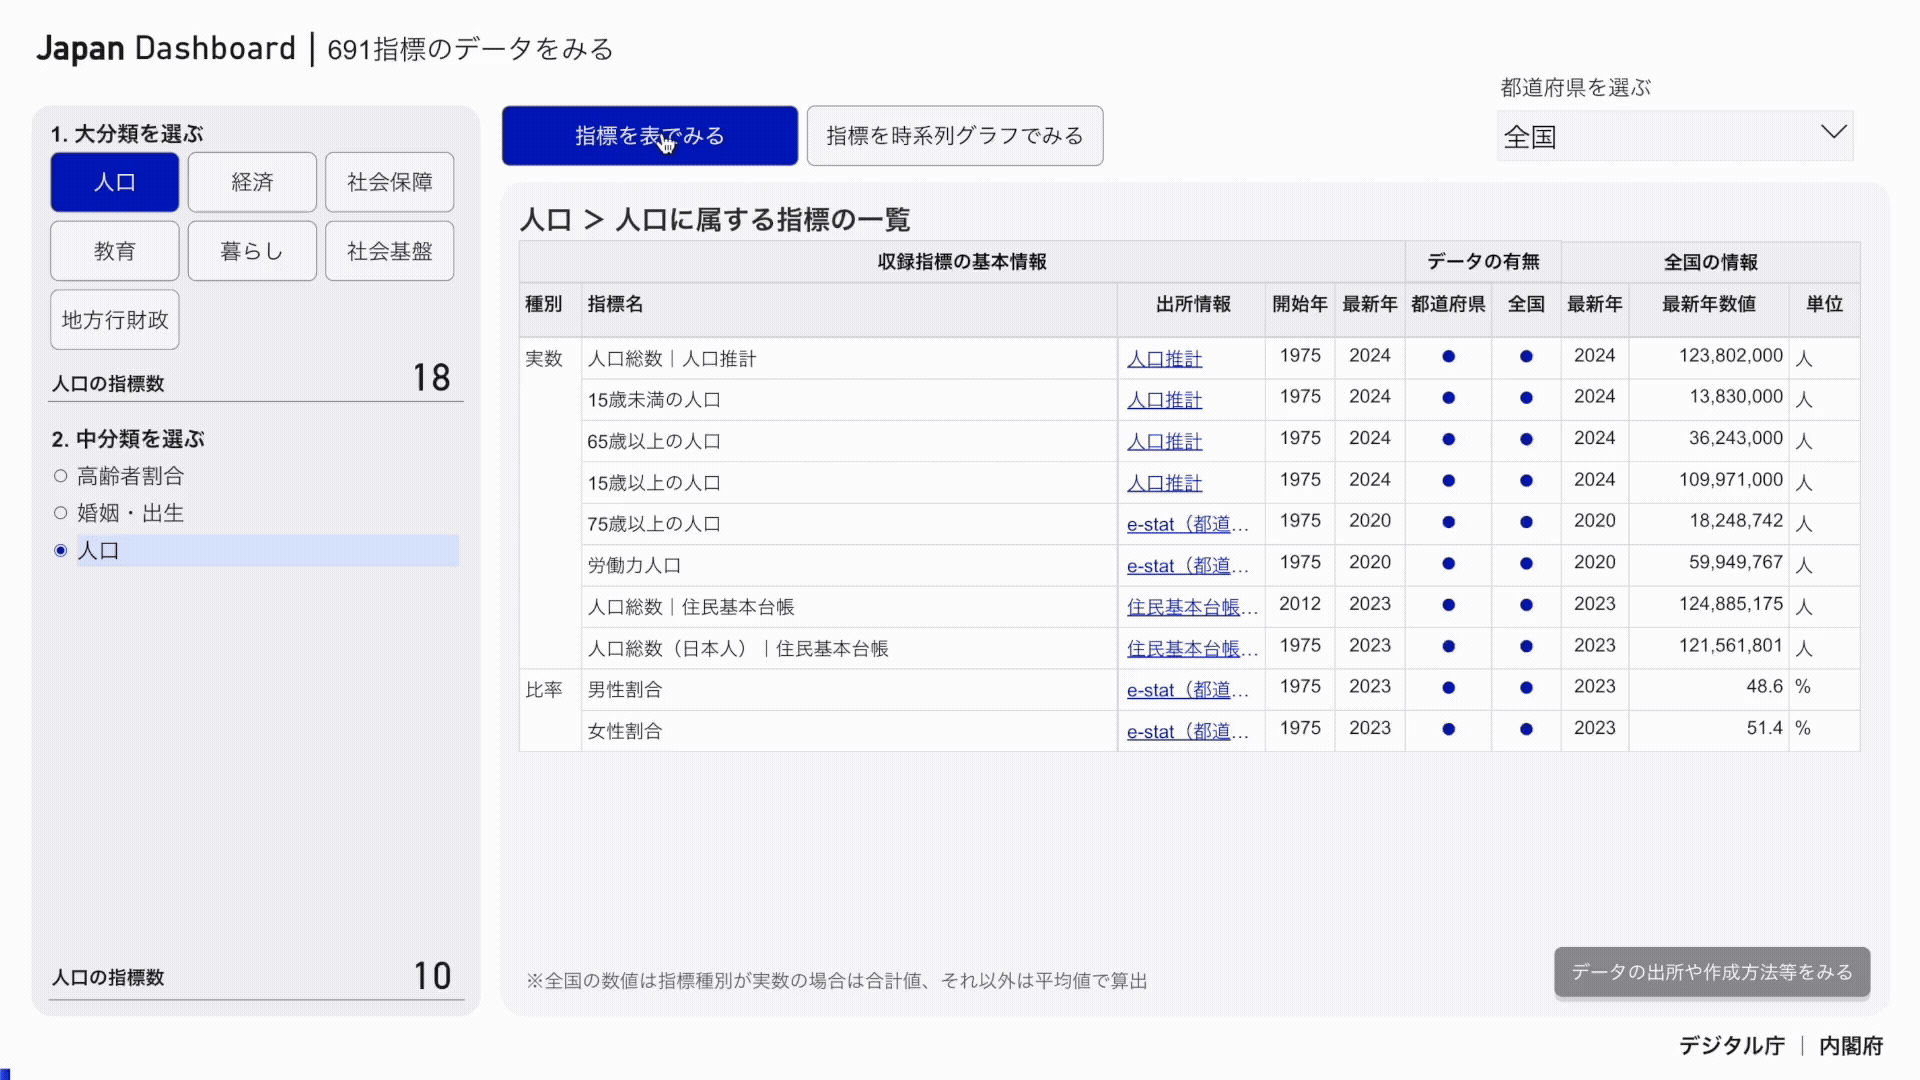
1. Look at the indicator data
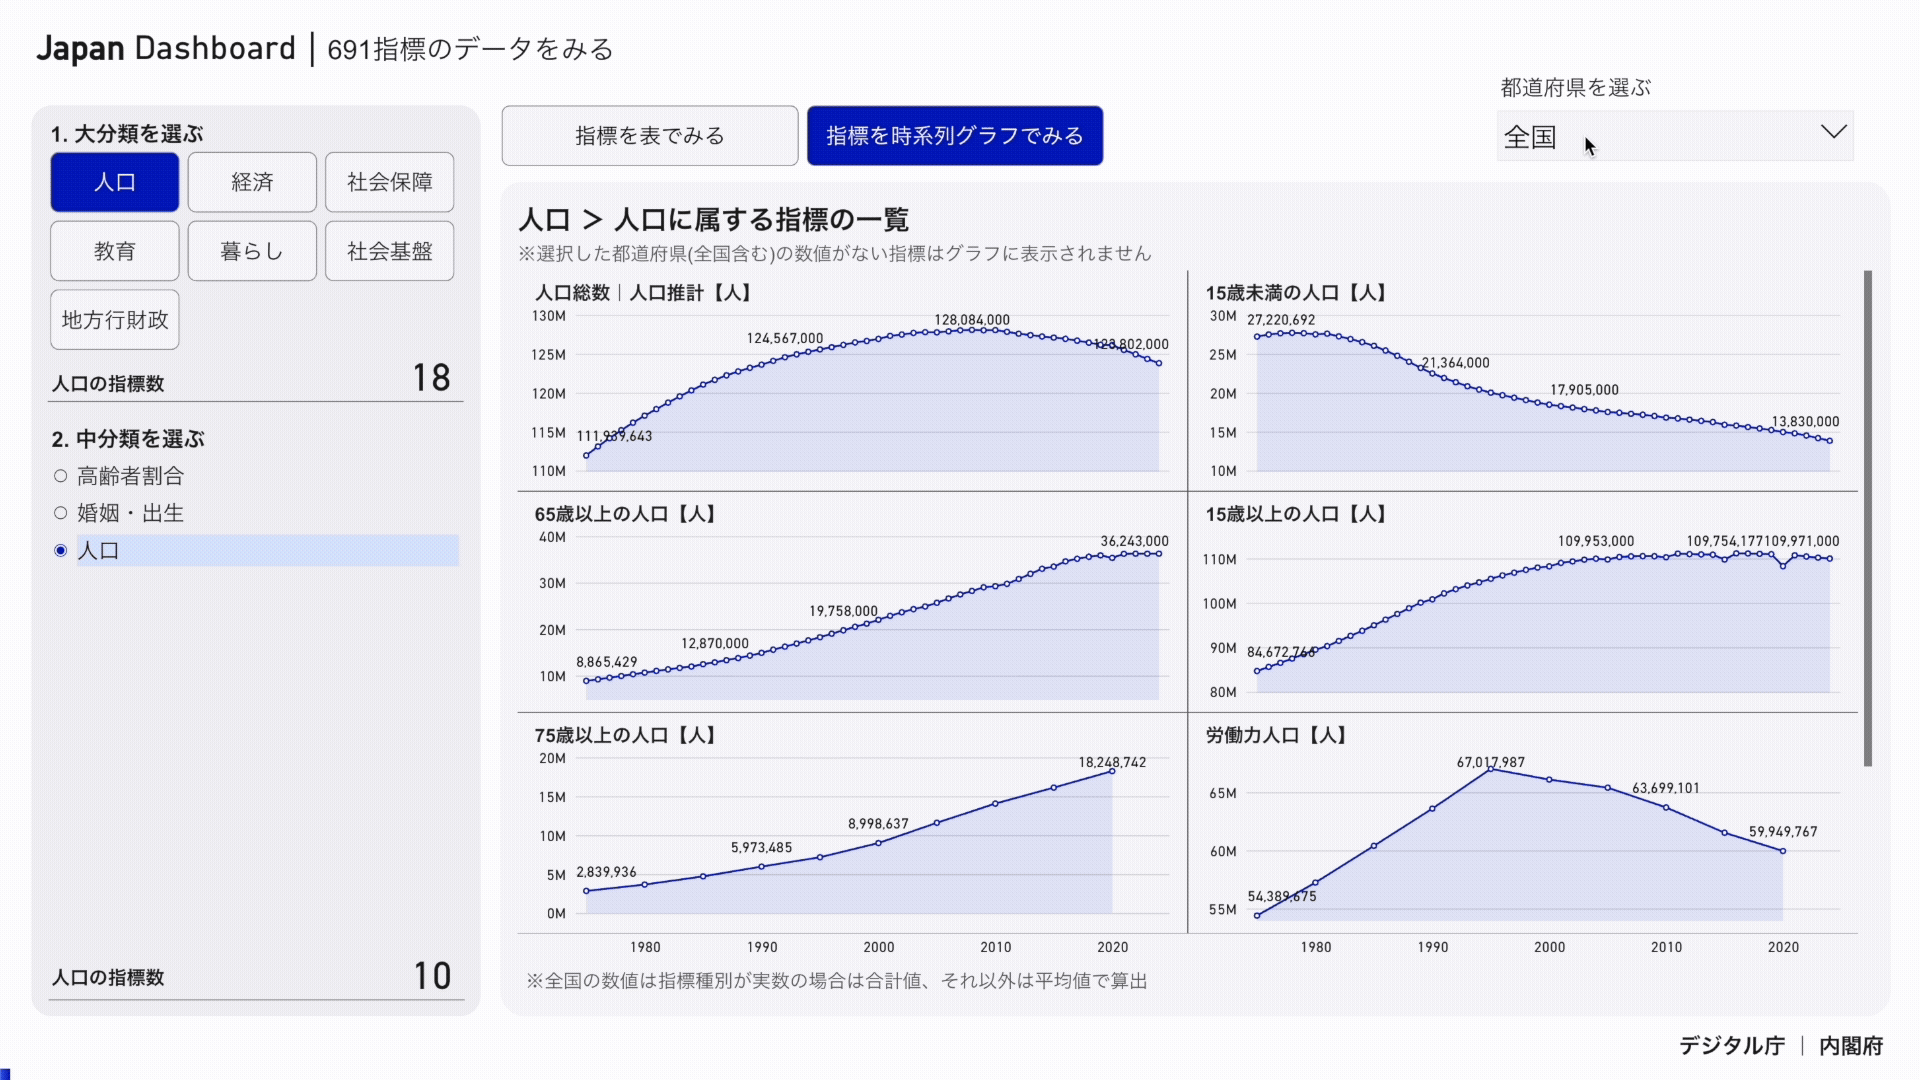
1. Switch between a table and a time series chart
- Select an item from "1. Select a major category" and then select an item from "2. Select a minor category" to display the corresponding index list.
- You can change the display format by "View indicator in table" or "View indicator in time series graph".
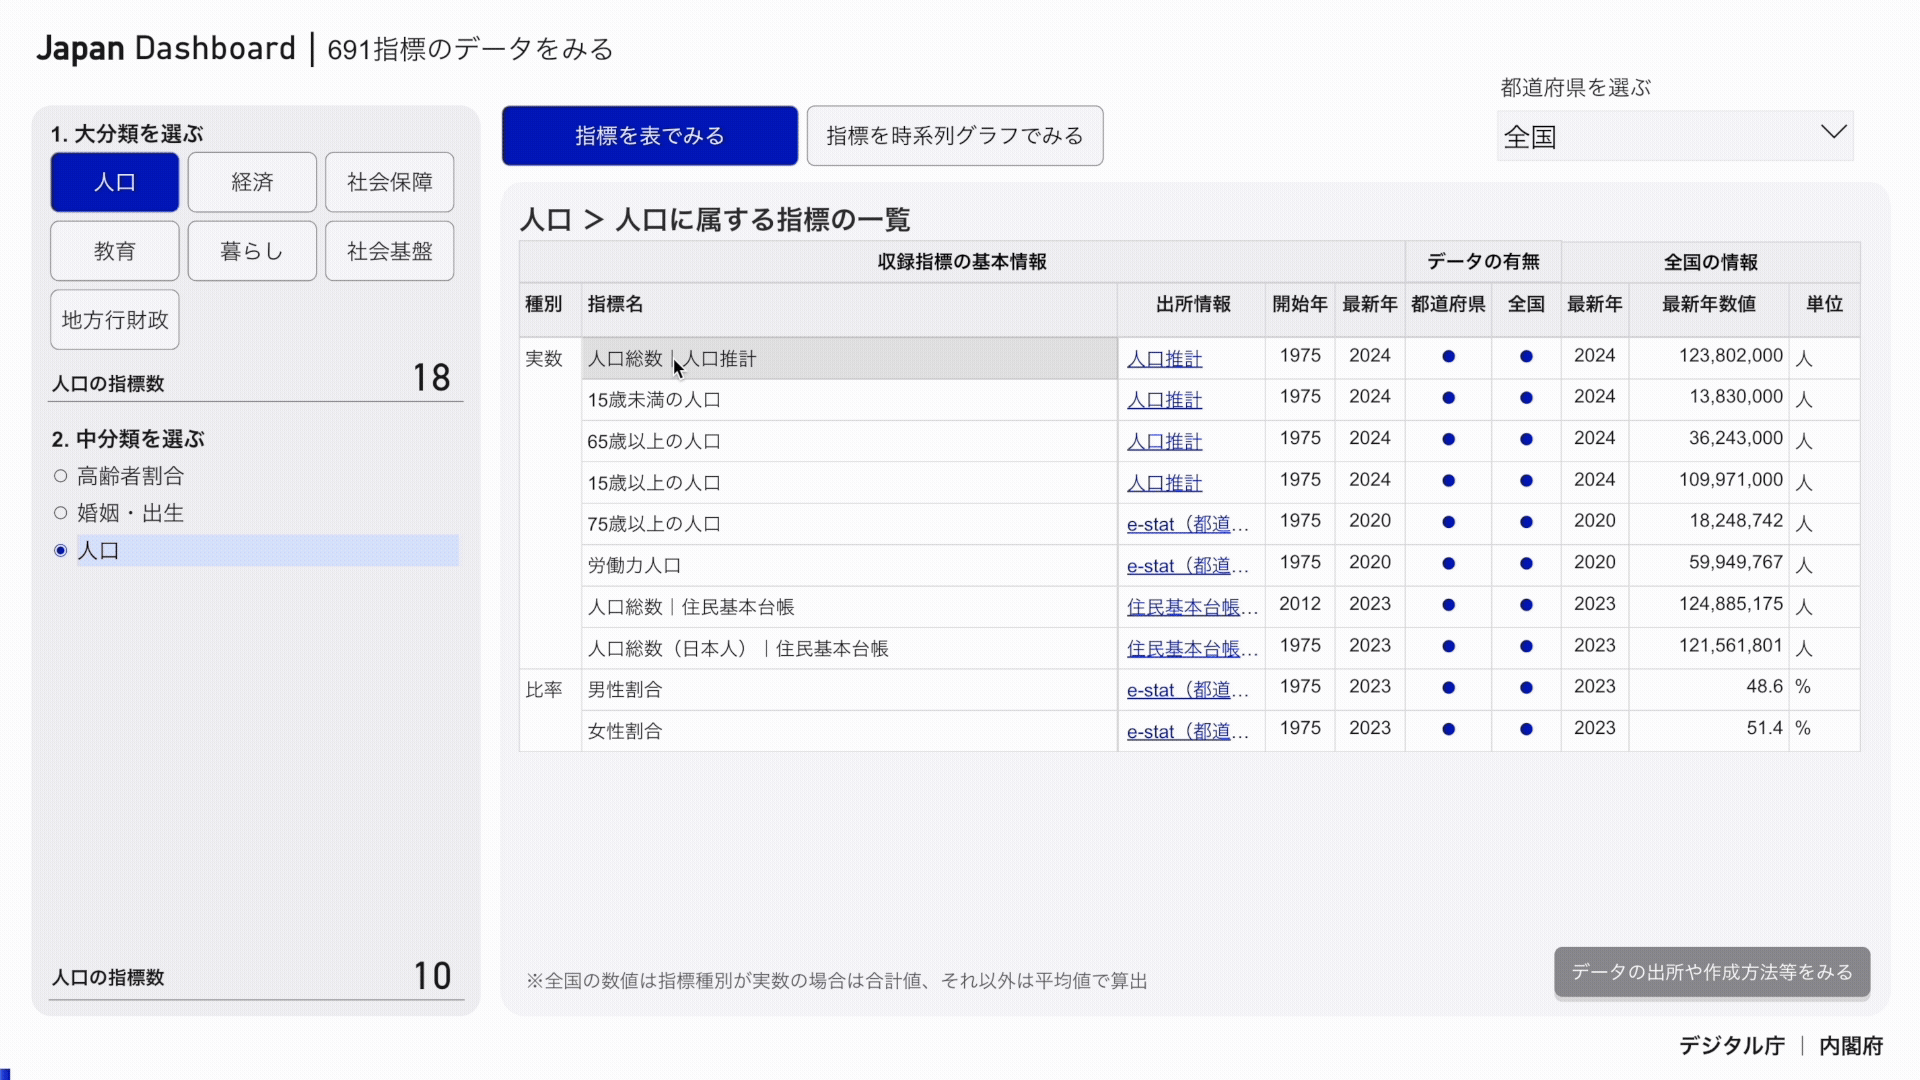
1.2 Reviewing Data Details
- You can check the detailed information of the data by selecting the index in the table and clicking "Check the source of data, creation method, etc.".
- If you click the link of the source information, you can go to the website of the data source.
1.3 Checking national and prefectural figures
- Click "Select prefecture" and select one prefecture.
- You can view the data of the selected prefecture in a list.
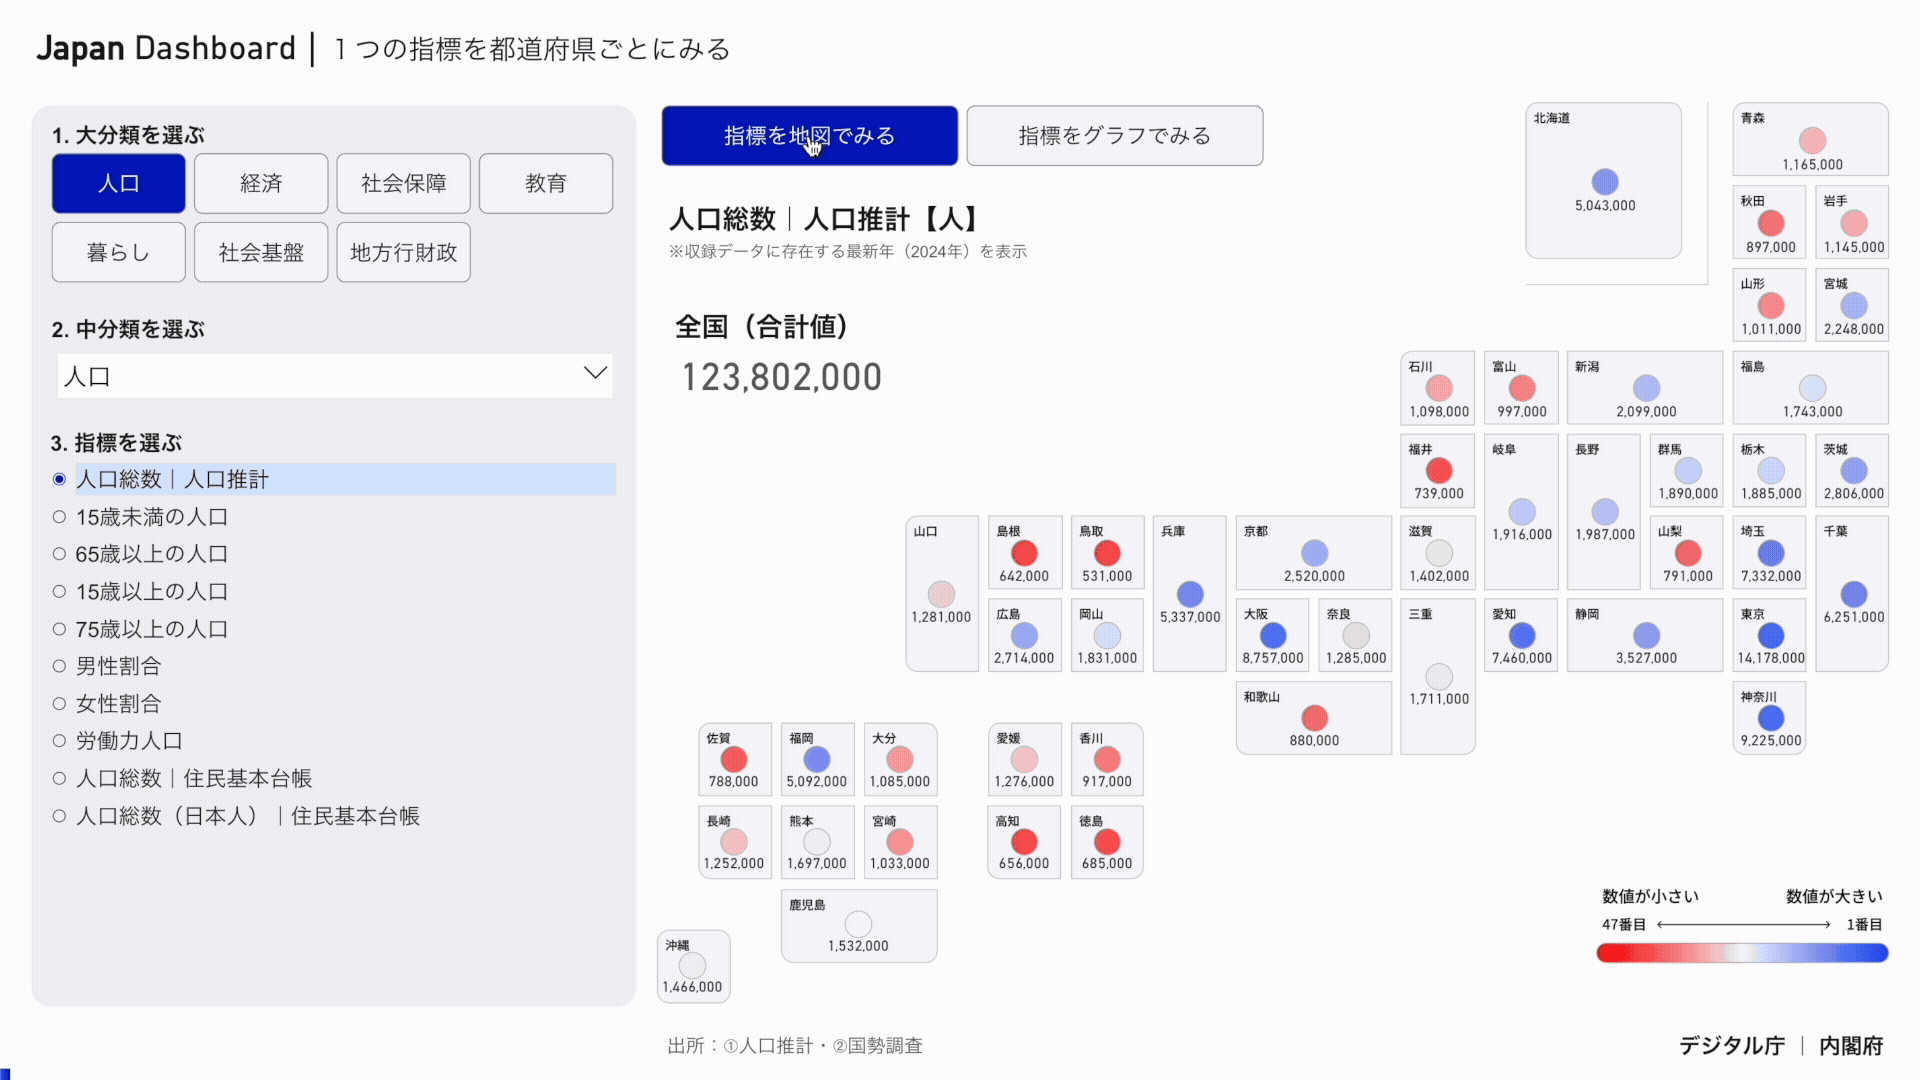
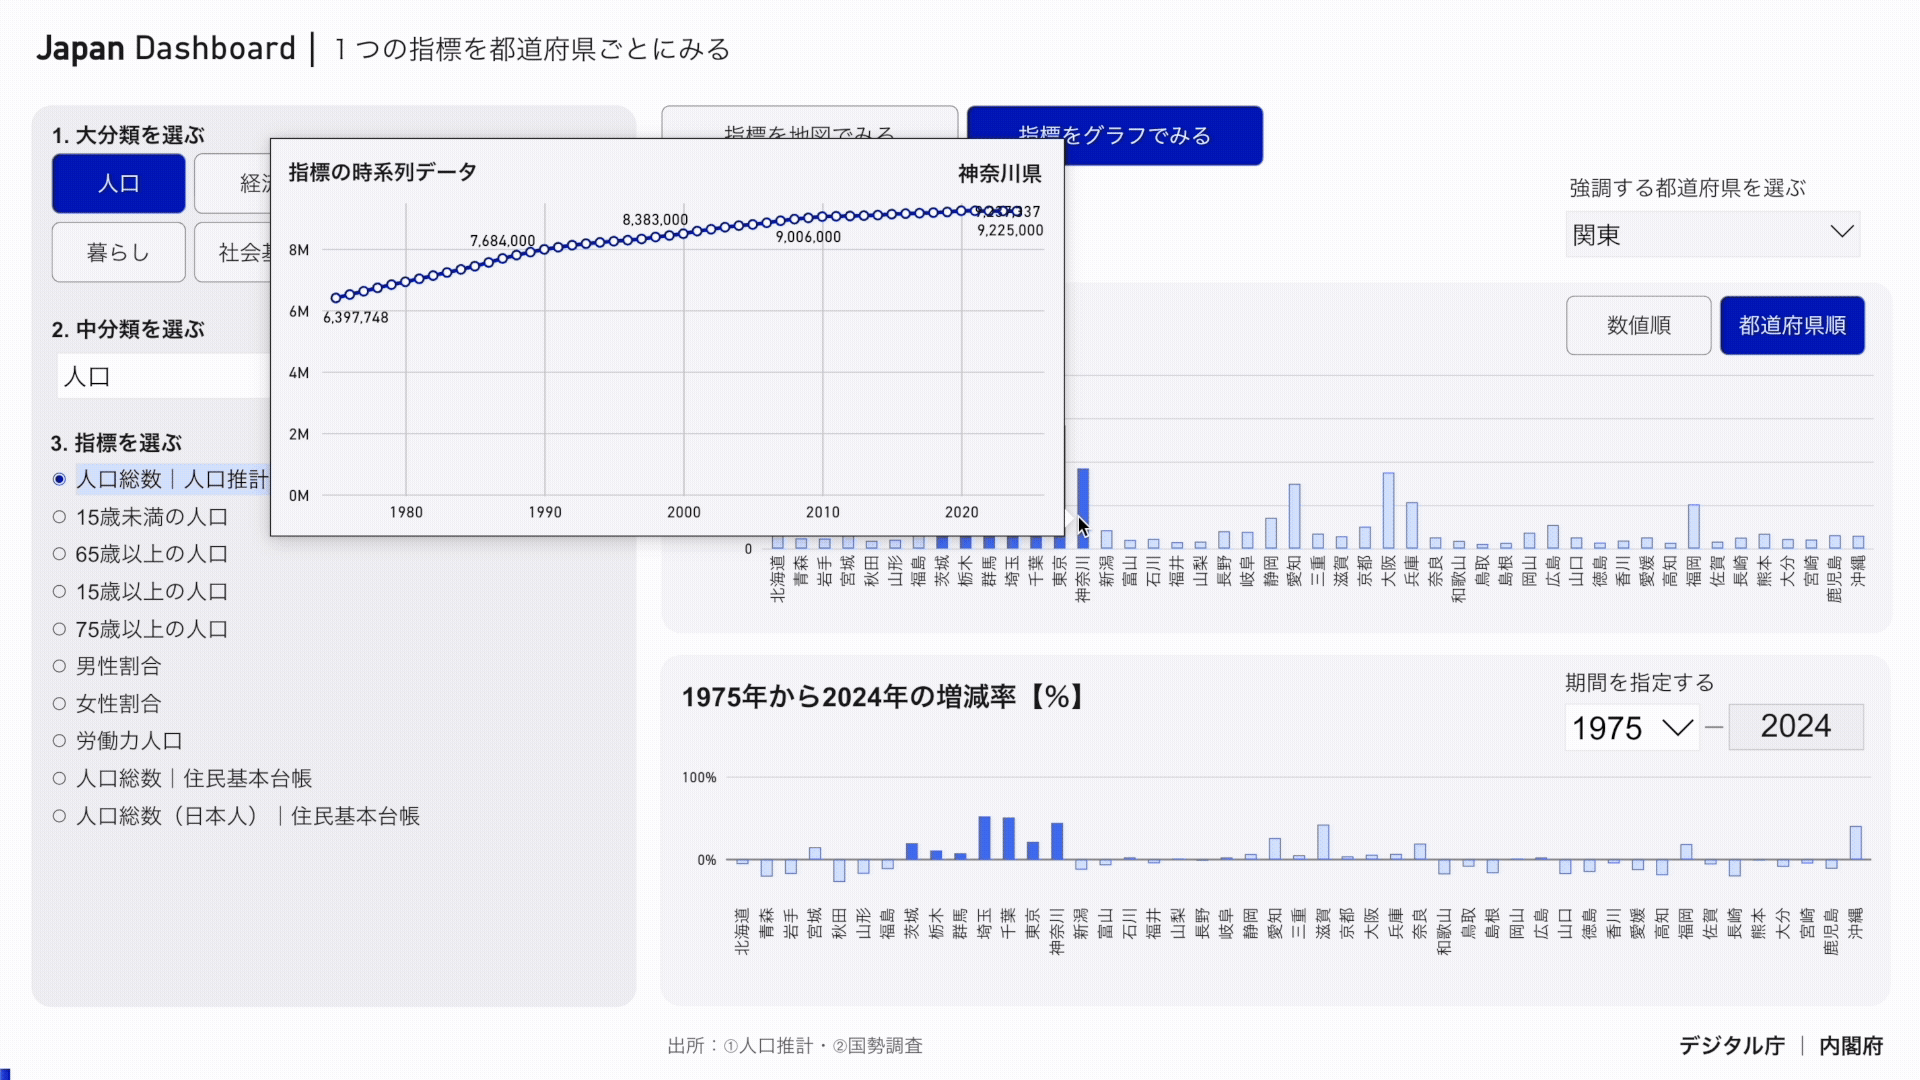
2. Looking at one indicator by prefecture
2.1 Setting Indicators
- Select an item from "1. Select a major category" and then select an item from "2. Select a minor category" to display the corresponding index list.
- Finally, select the indicator for which you want to check the numerical value from "3. Select an indicator".
- You can view the data of selected indicators in a map or graph format.
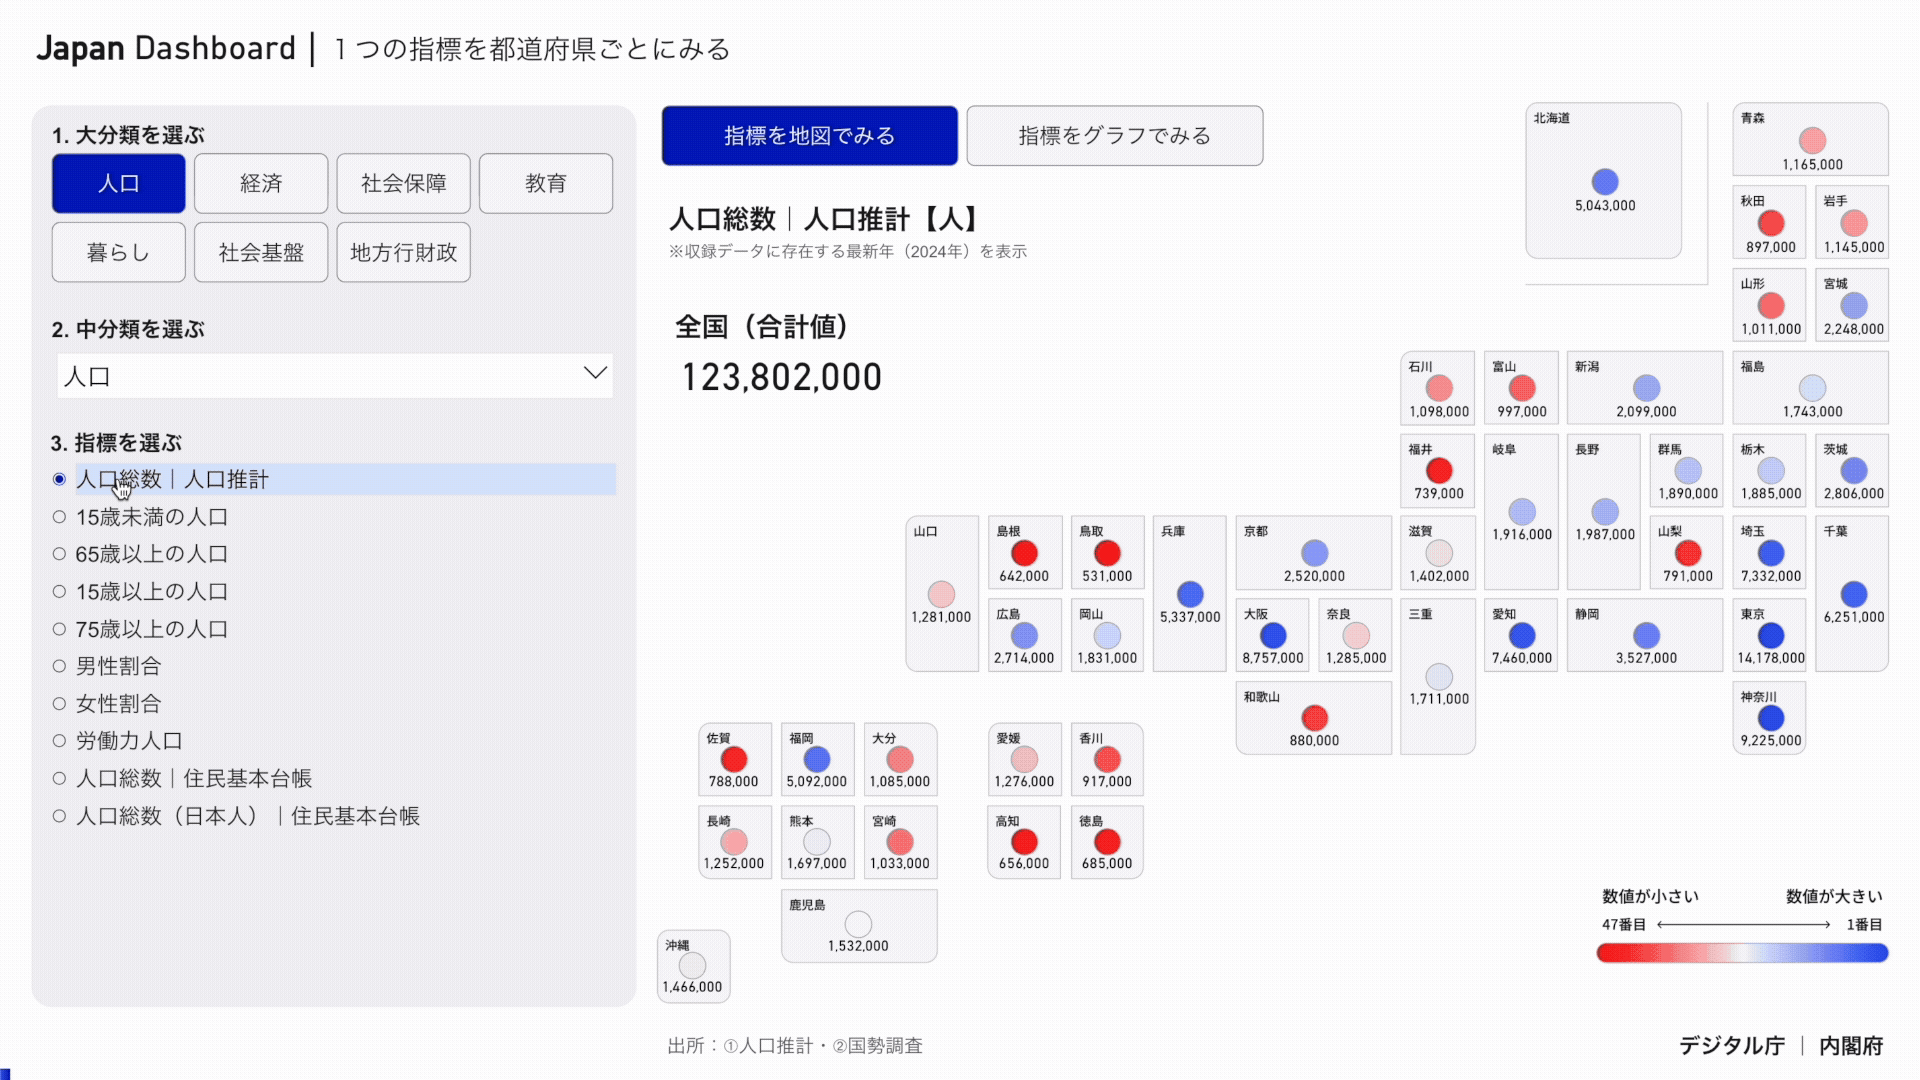
2.2 Switching between map and graph
- If you select "Look at indicators on a map", you can see the data in the form of a map of Japan.
- You can view the data in a graph format by selecting "View indicator in graph".
2.3 Switching between prefecture order and numerical order
- You can view by prefecture code by selecting "By prefecture".
- If you select "Numeric order", you can see the numbers in descending order.
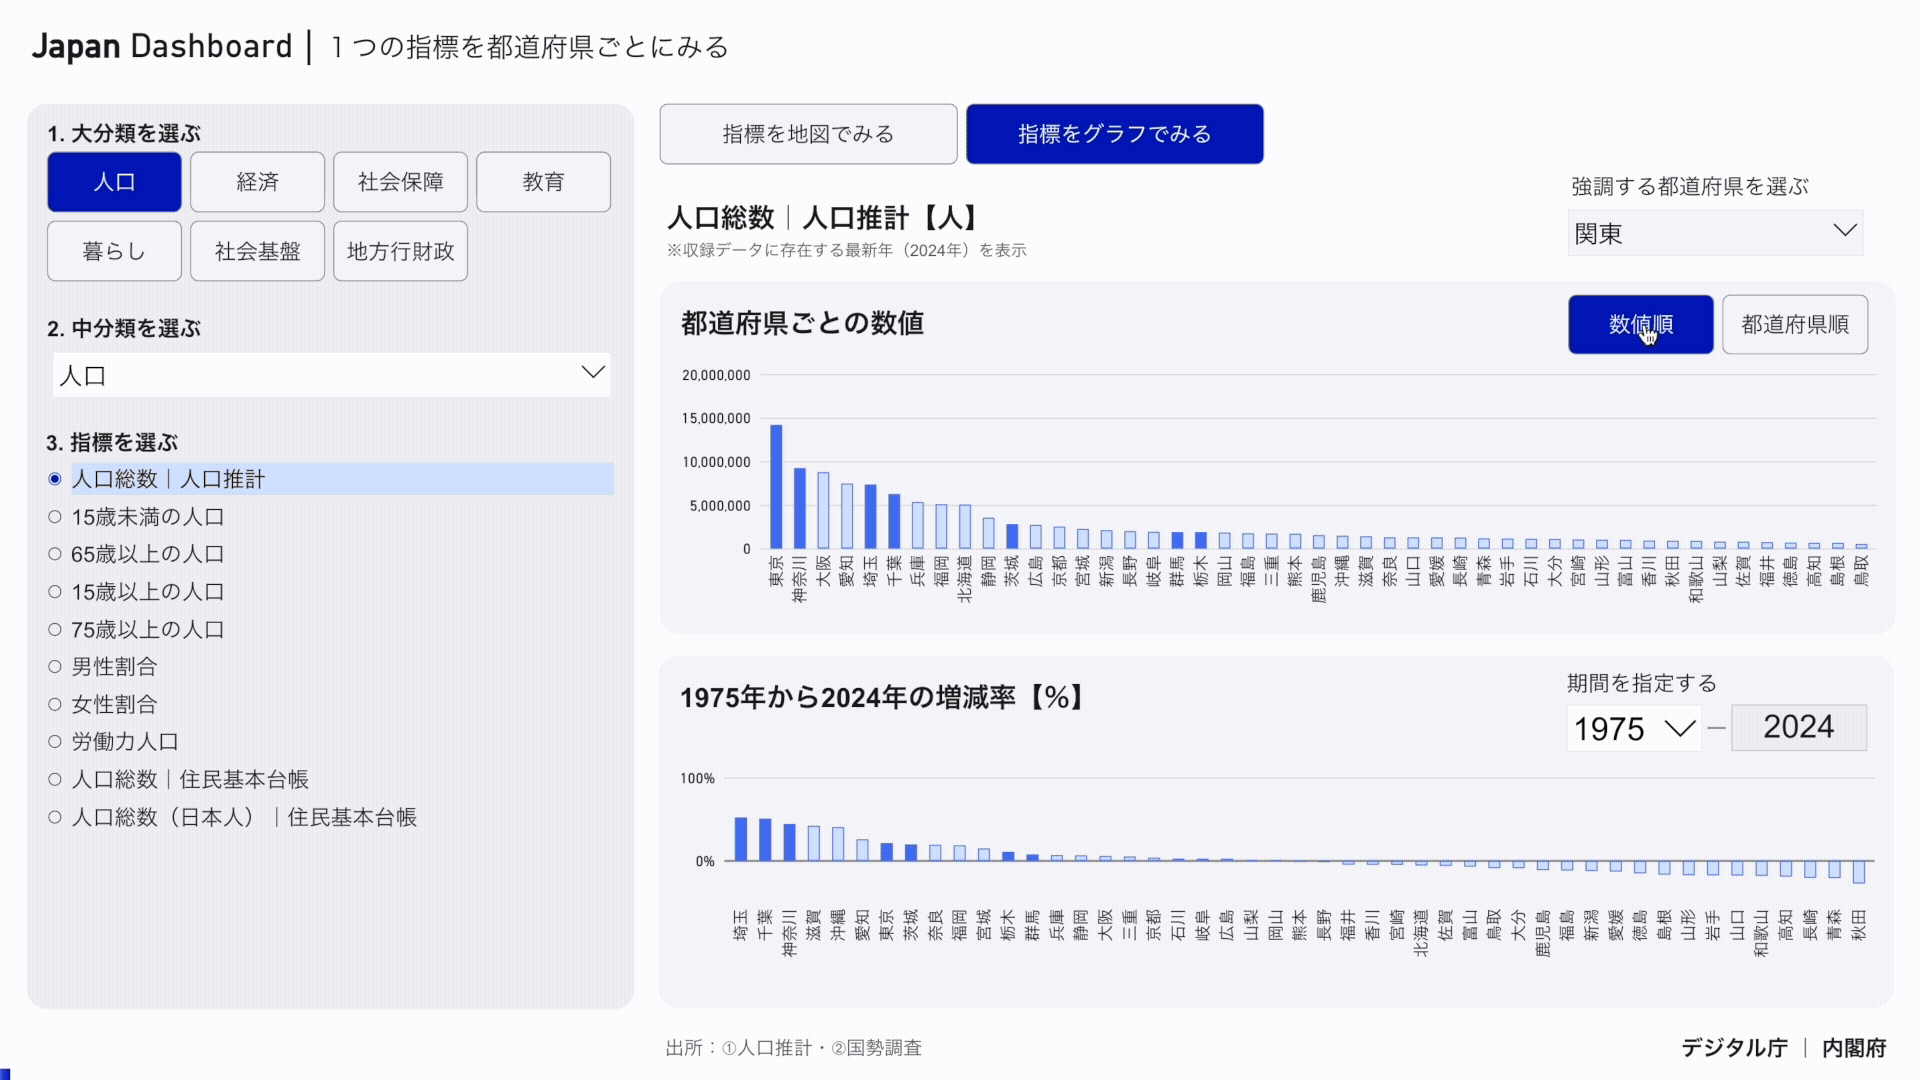
2.4 Highlighting Specific Prefectures
- Select an area or prefecture from "Select prefecture to highlight".
- The graph color of the unselected area or prefecture becomes light, and the graph color of the selected area or prefecture becomes dark.
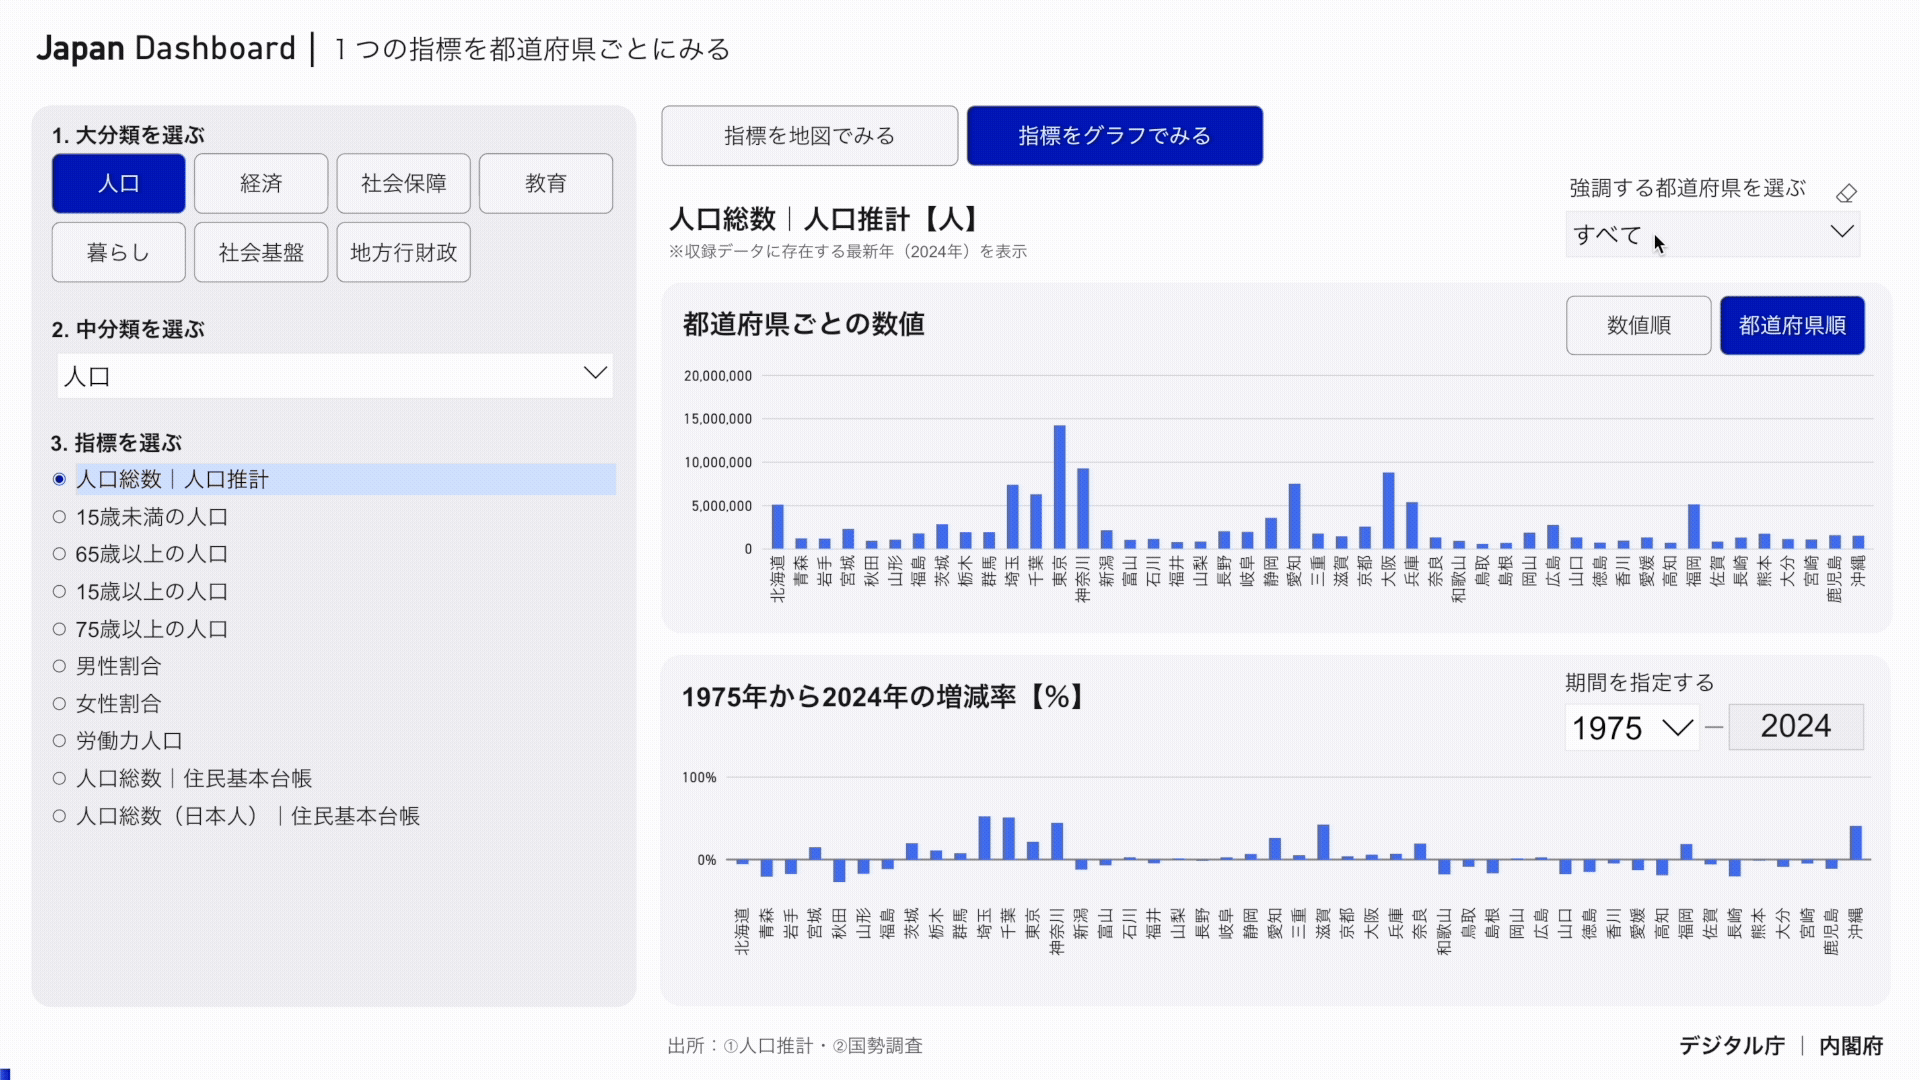
2.5 Look at the rate of change Specify a time period
- You can change the starting year for the percent change from Specify Time Period.
*The ending year of the percentage change is fixed at the latest year for which data for the indicator exists.
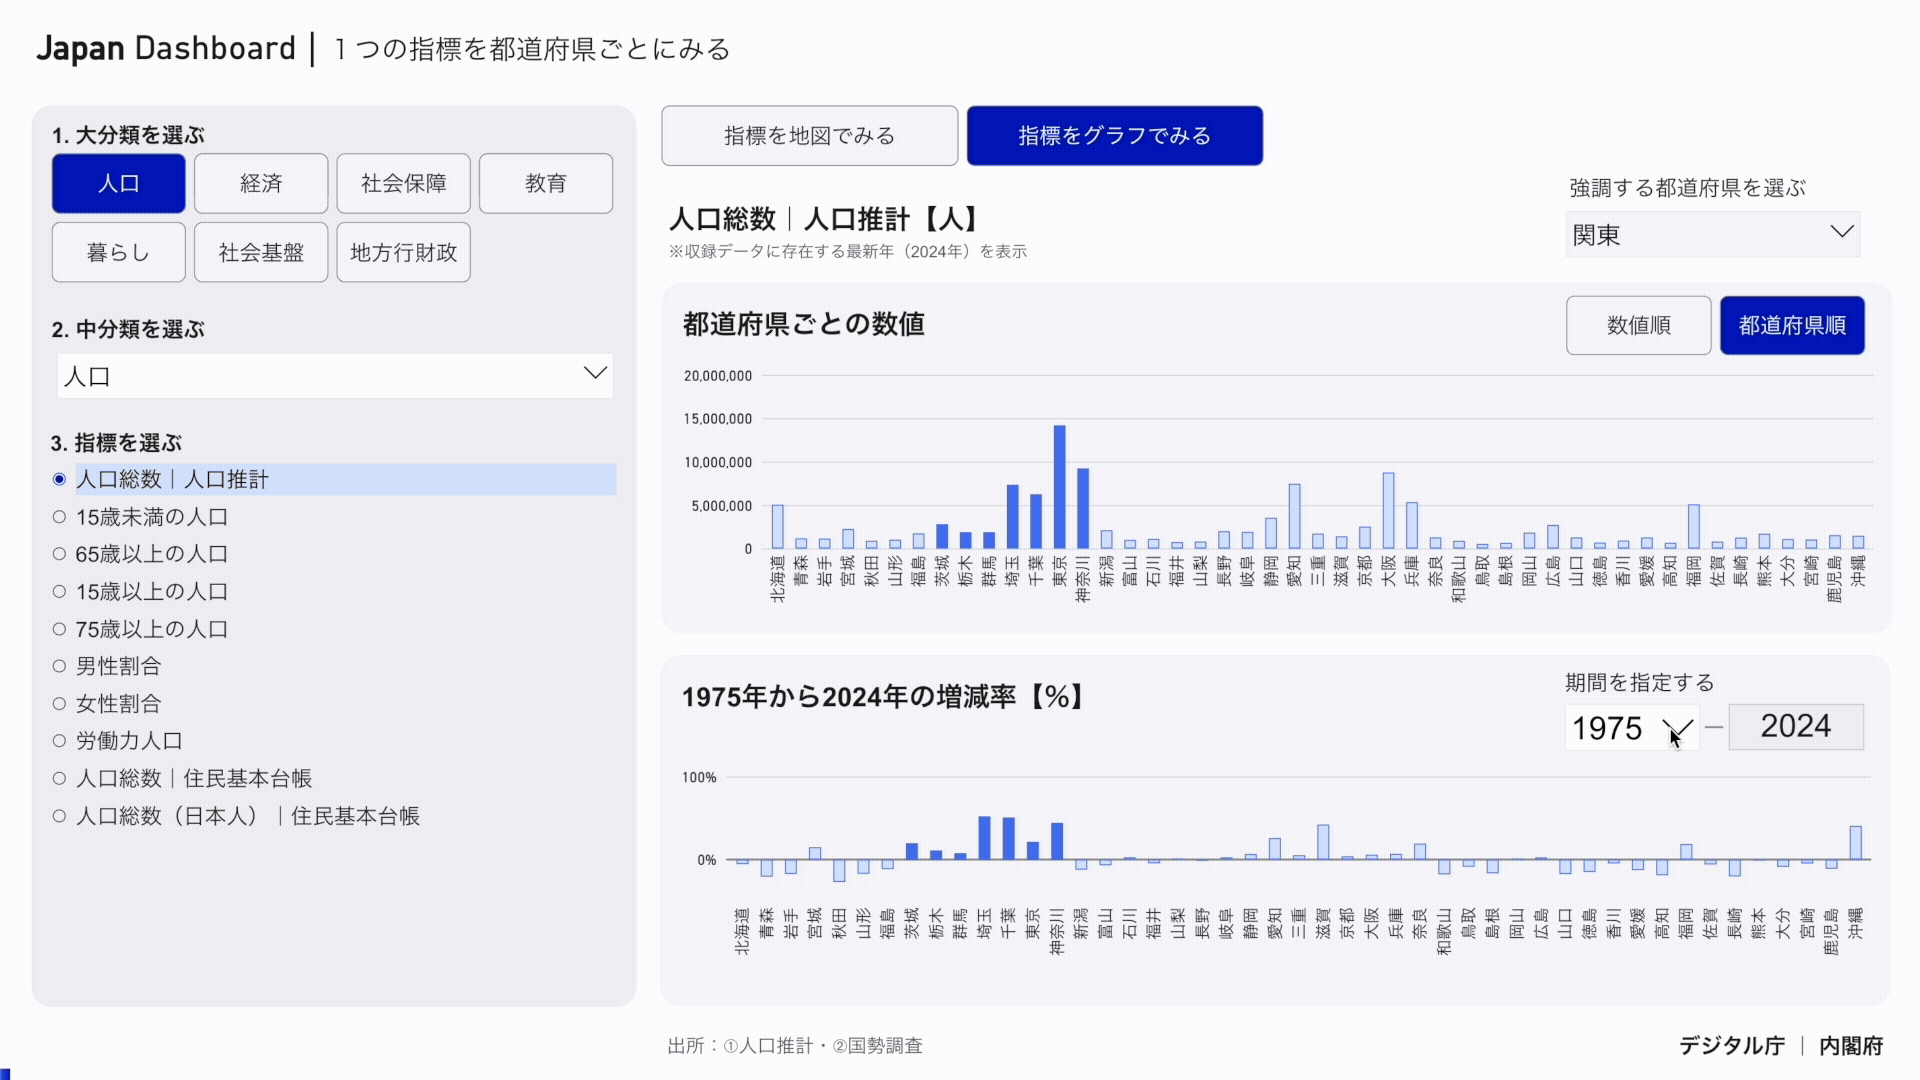
2.6 Reviewing Time Series Data
- If you hover your mouse over the bar graph, you can check the annual transition of that prefecture.
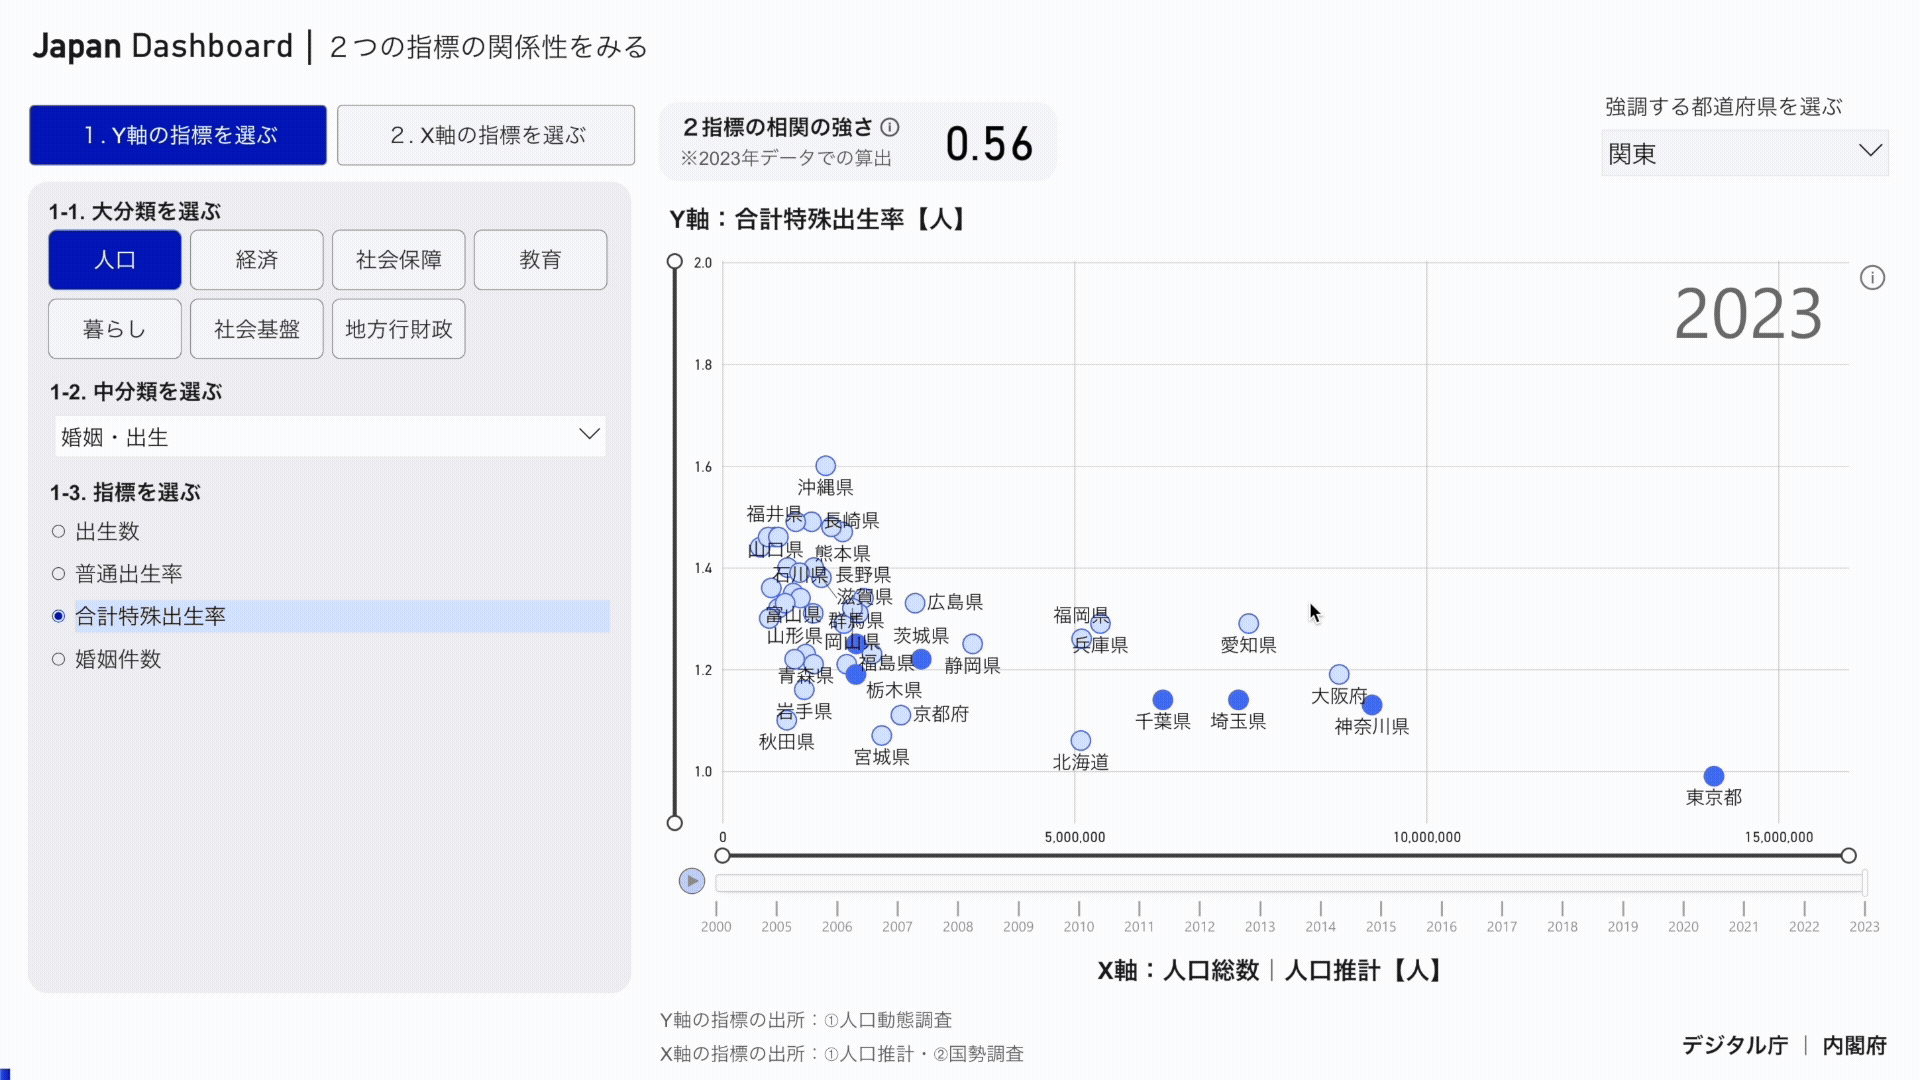
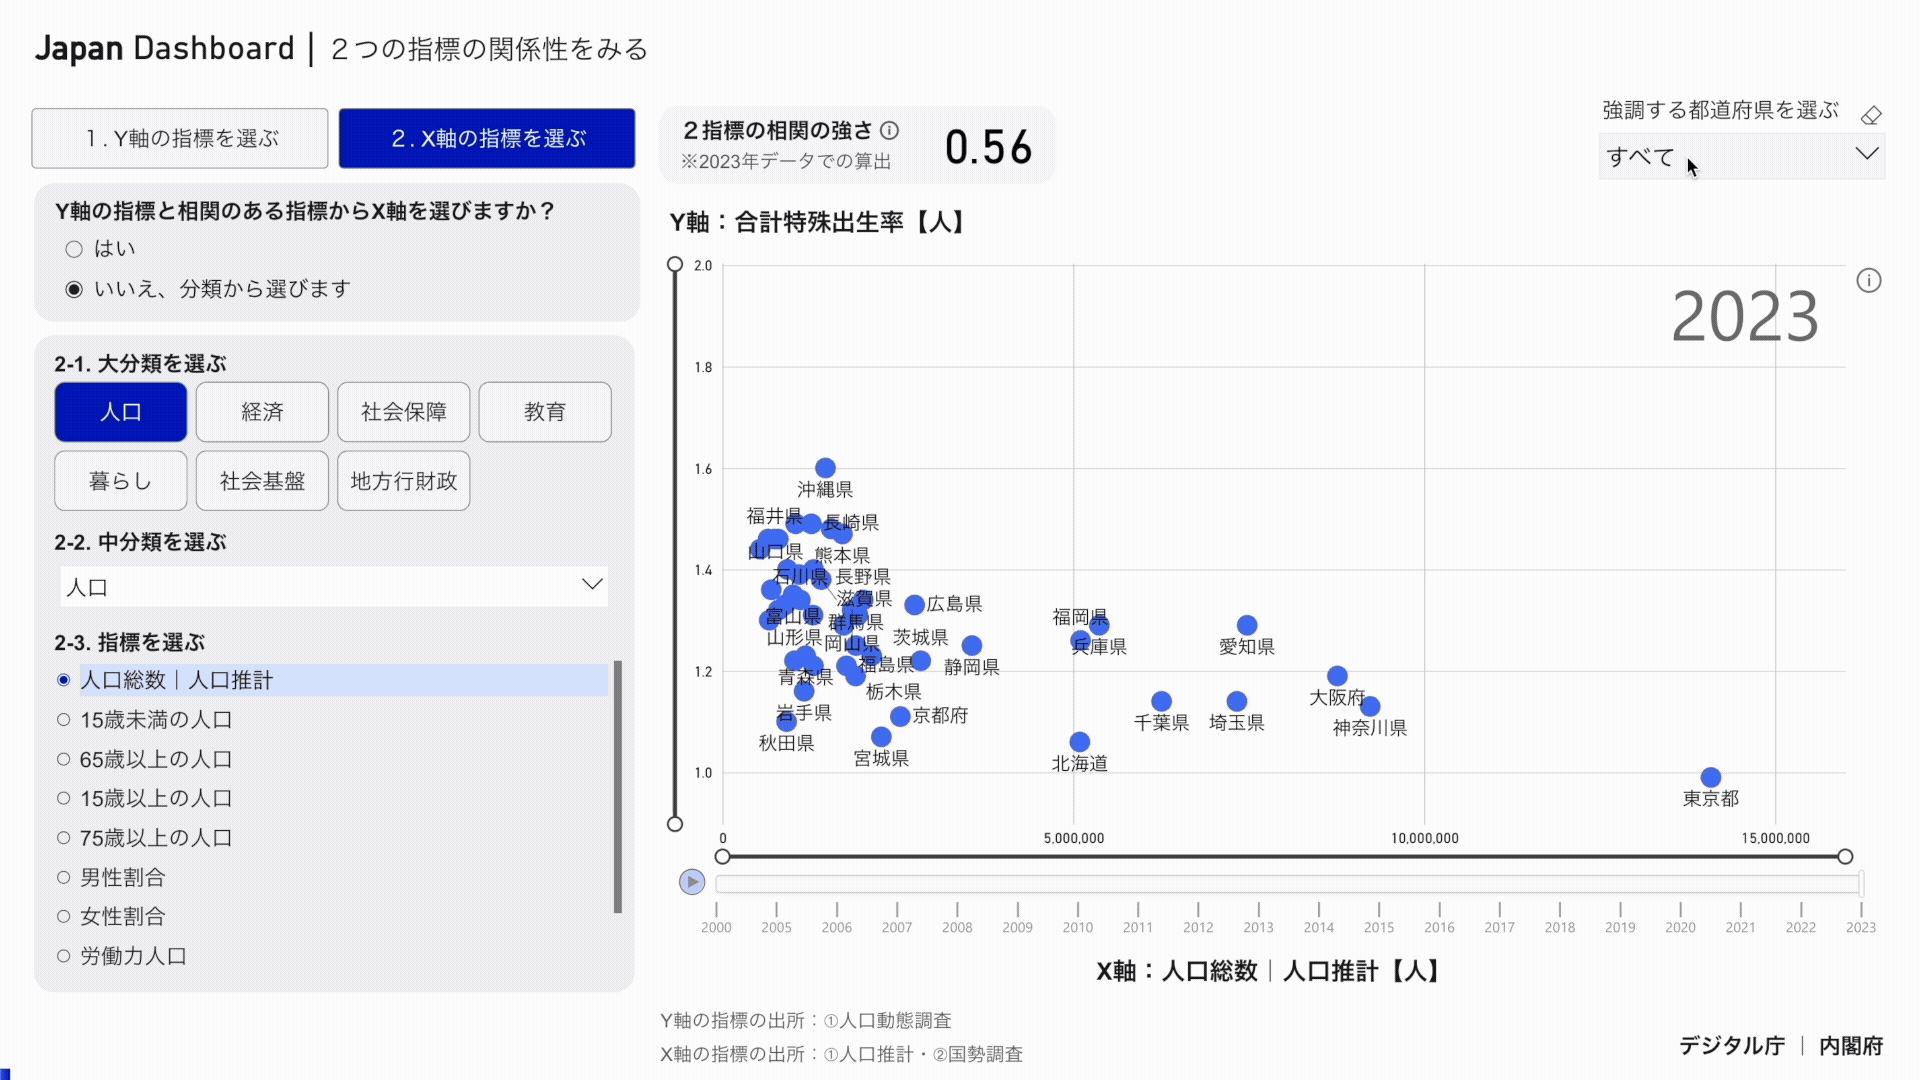
3. Examining the relationship between the two indicators
Operation Assumptions
- Only fiscal years for which data for the two indicators on the Y and X axes are available are shown.
- Since the Y-axis is the main axis, the Y-axis can be selected from all indicators. On the other hand, since the X-axis is designed to display only indicators for which data exists for the same year as the indicator selected for the Y-axis, the number of indicators on the X-axis increases or decreases depending on the indicator selected for the Y-axis. This dashboard recommends that you set the indicators you want to analyze on the Y-axis, and view the data while switching the X-axis.
3.1 Setting the Y-Axis Index
- Select "1. Select the Y-axis indicator".
- Select an item from "1-1. Select major category" and then select an item from "1-2. Select minor category" to display a list of corresponding indicators.
- Finally, select the indicator that you want to set for the Y axis from "1-3. Select indicator".
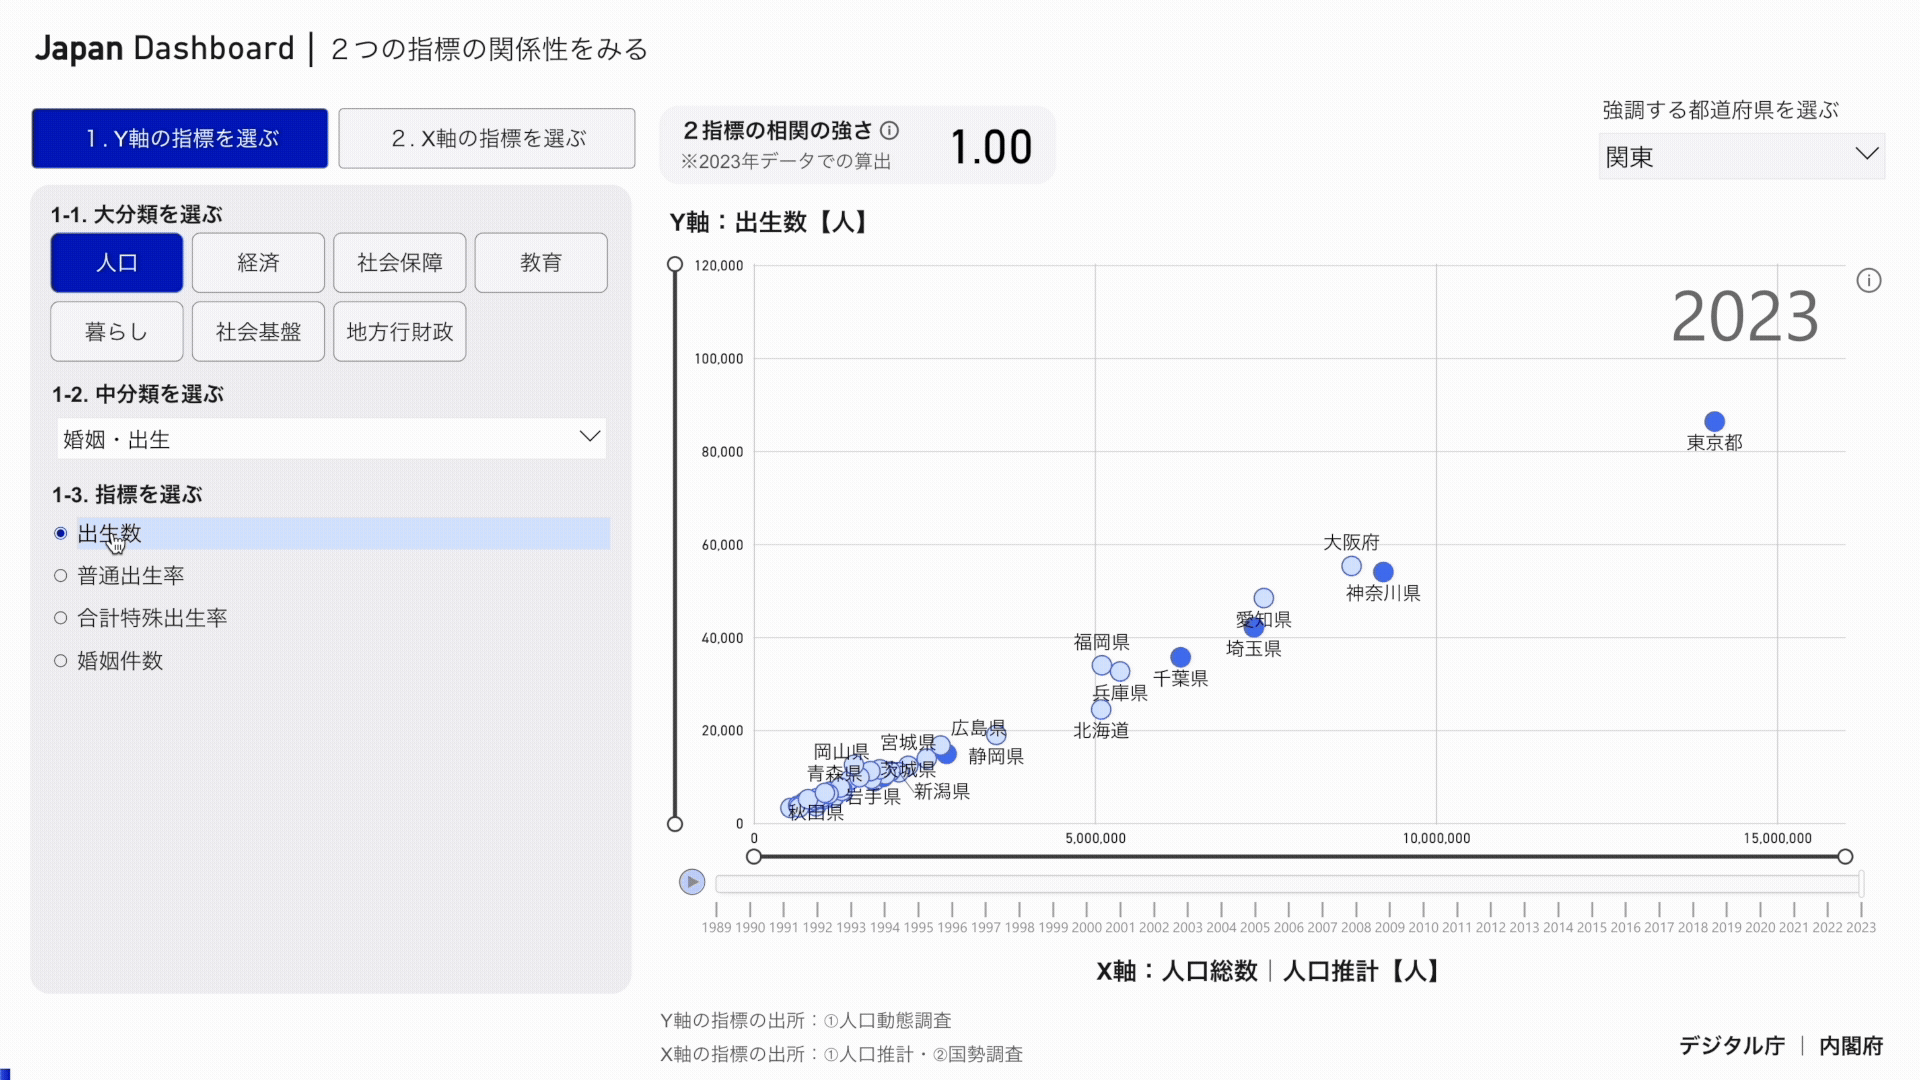
3.2 Setting the X-Axis Index
- First, select "1. Select the X-axis indicator".
- When "Yes" is selected in "Select the X-axis from indicators correlated with the Y-axis indicator?"
- A. Select an item from "2-1. Select major category".
- B. Narrow down the indicators in "2-2. Narrow down indicators based on the strength of correlation".
- C. From "2-3. Select indicator", select the indicator you want to set for the X-axis.
- D. You can select which of the correlated metrics to display on the X-axis of the metric.
- When you select "No, I will choose from the categories" in "Do you want to choose the X axis from the indicators that correlate with the Y axis indicator?"
- A. Select an item from "2-1. Select major category".
- B. Select an item from "2-2. Select medium category".
- C. From "2-3. Select indicator", select the indicator you want to set for the X-axis.

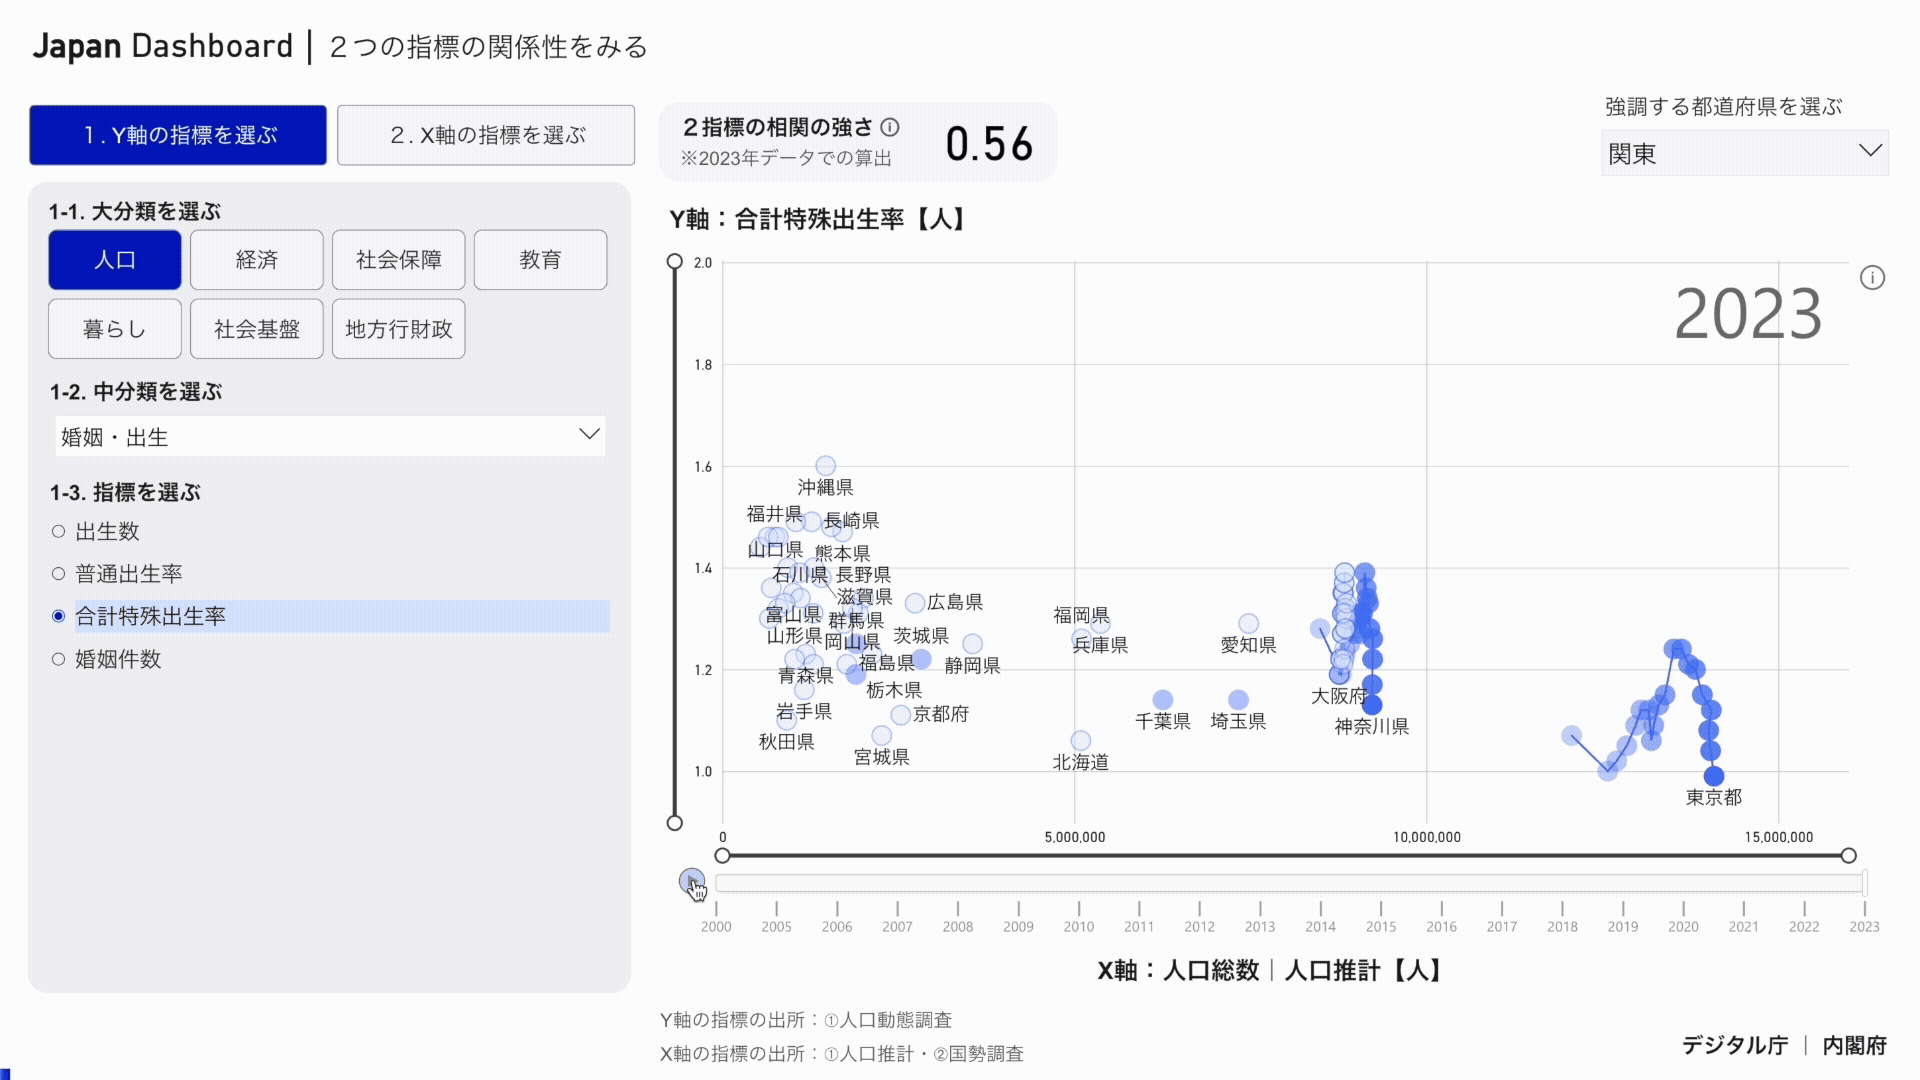
3.3 Displaying Time-Series Trajectories
- If you click a specific prefecture, you can check the annual transition.
- You can select multiple prefectures by clicking while holding down the ctrl key on the keyboard.
- You can select multiple prefectures by dragging in the graph.
3.4 Observing changes over time
- If you click the play mark at the bottom left of the scatter chart, you can see an animation of changes over time for the years that have data for both the Y axis and the X axis.
3.5 Highlighting Specific Prefectures
- Select an area or prefecture from "Select prefecture to highlight".
- The graph color of the unselected area or prefecture becomes light, and the graph color of the selected area or prefecture becomes dark.
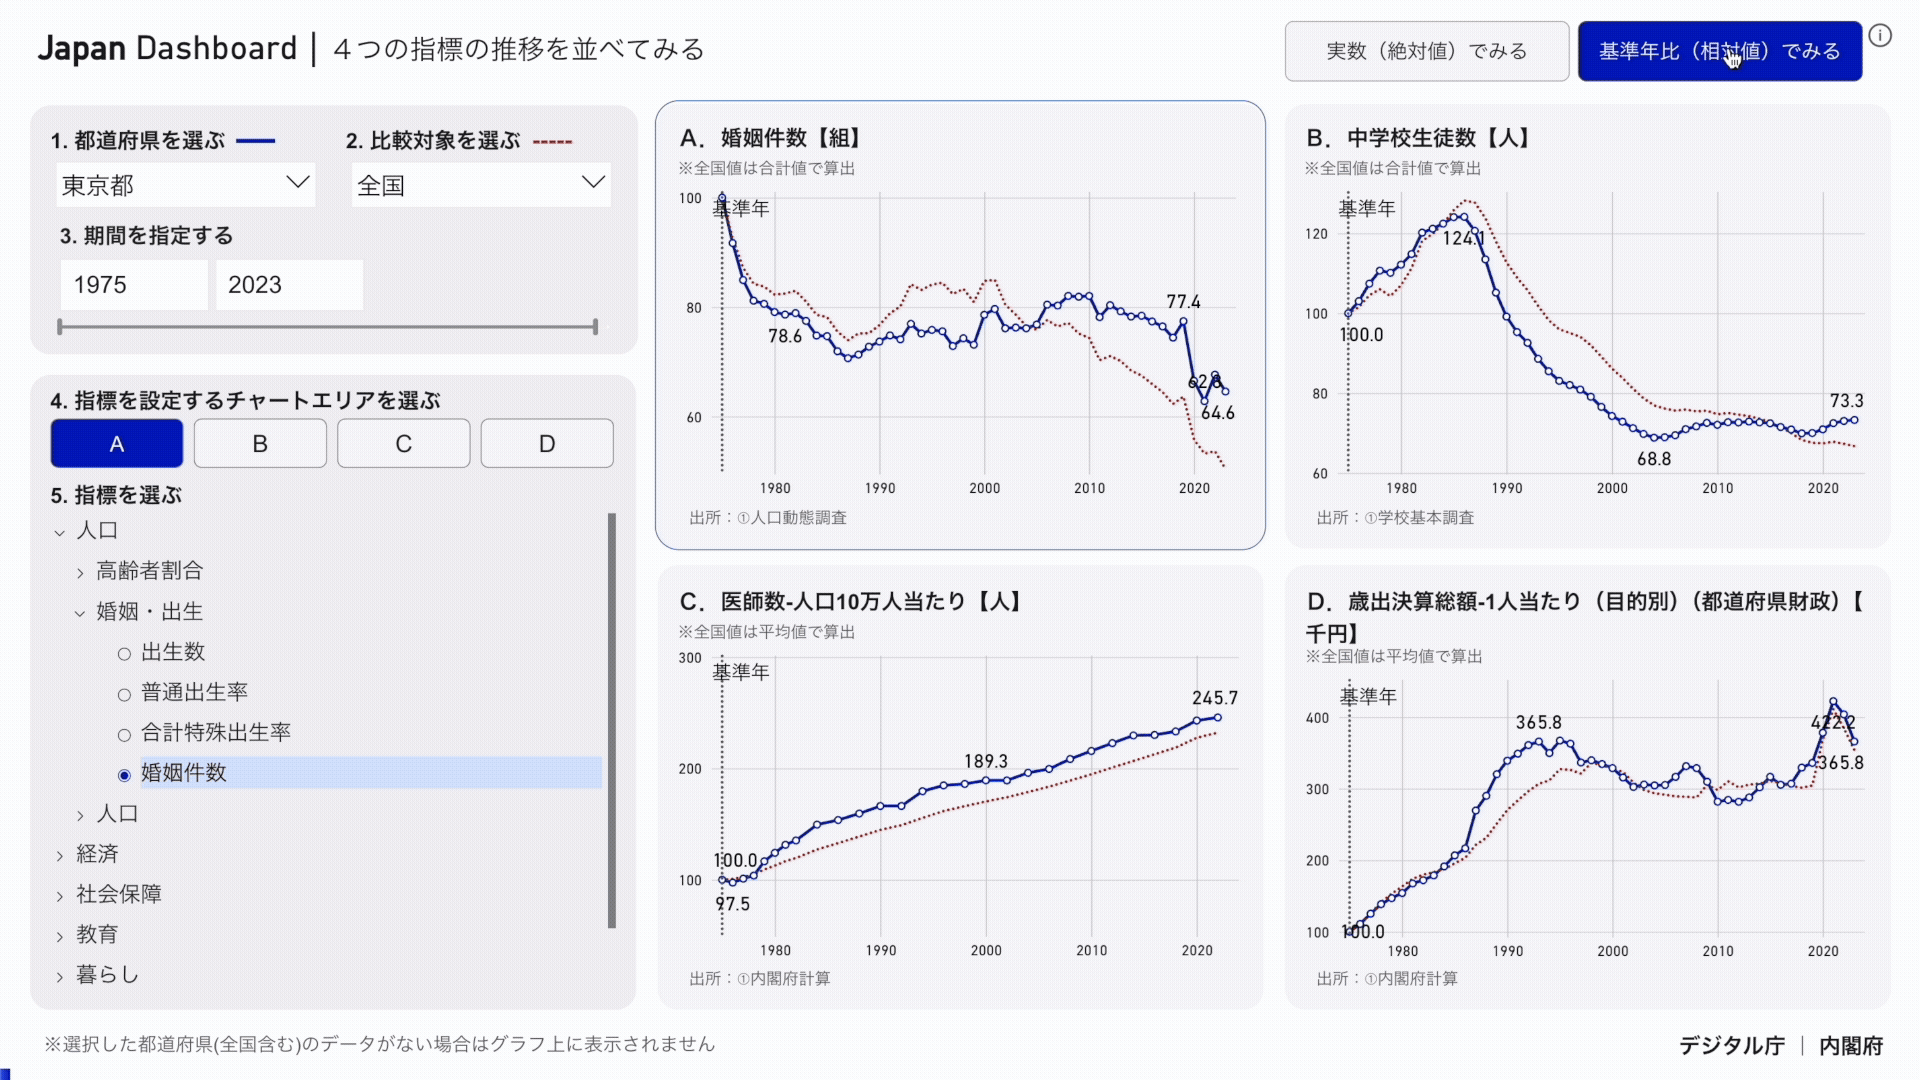
4. Lining up the four indicators
4.1 Select the chart area and select the indicator
- From "1. Select prefecture" and "2. Select comparison object", set the prefecture where you want to see the value.
- Next, specify the range of numbers you want to see from "3. Specify the period".
- Finally, from "4. Select the chart area to set the indicator", select the chart area (A to D) to change the indicator, and in "5. Select the indicator", select the indicator.
- Do the same for the other chart areas (A to D) and set the four graphs to display.
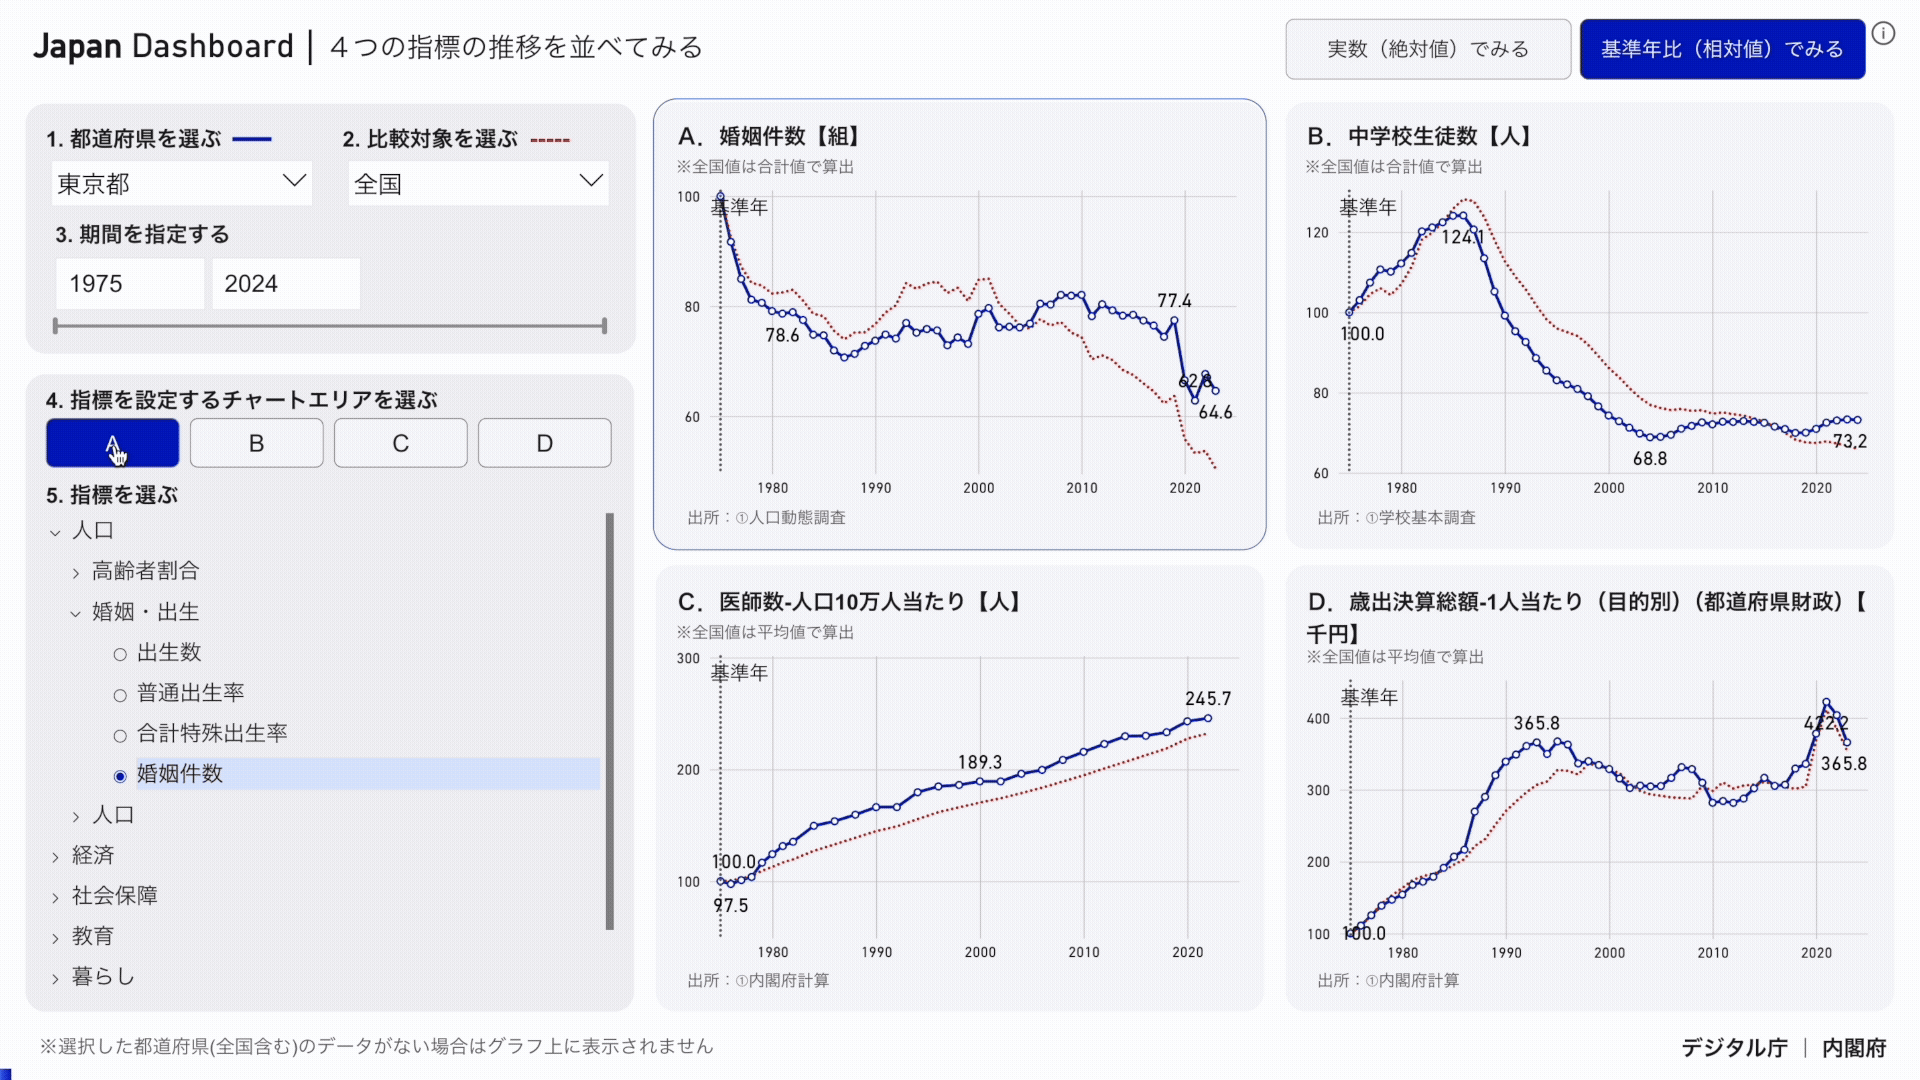
4.2 Changing the Chart Display Format
- If you select "Look at real numbers (absolute values)," you can see the annual change in real numbers.
- If you select "Compare with base year (relative value)", you can see the annual change of the value with the base year as 100.
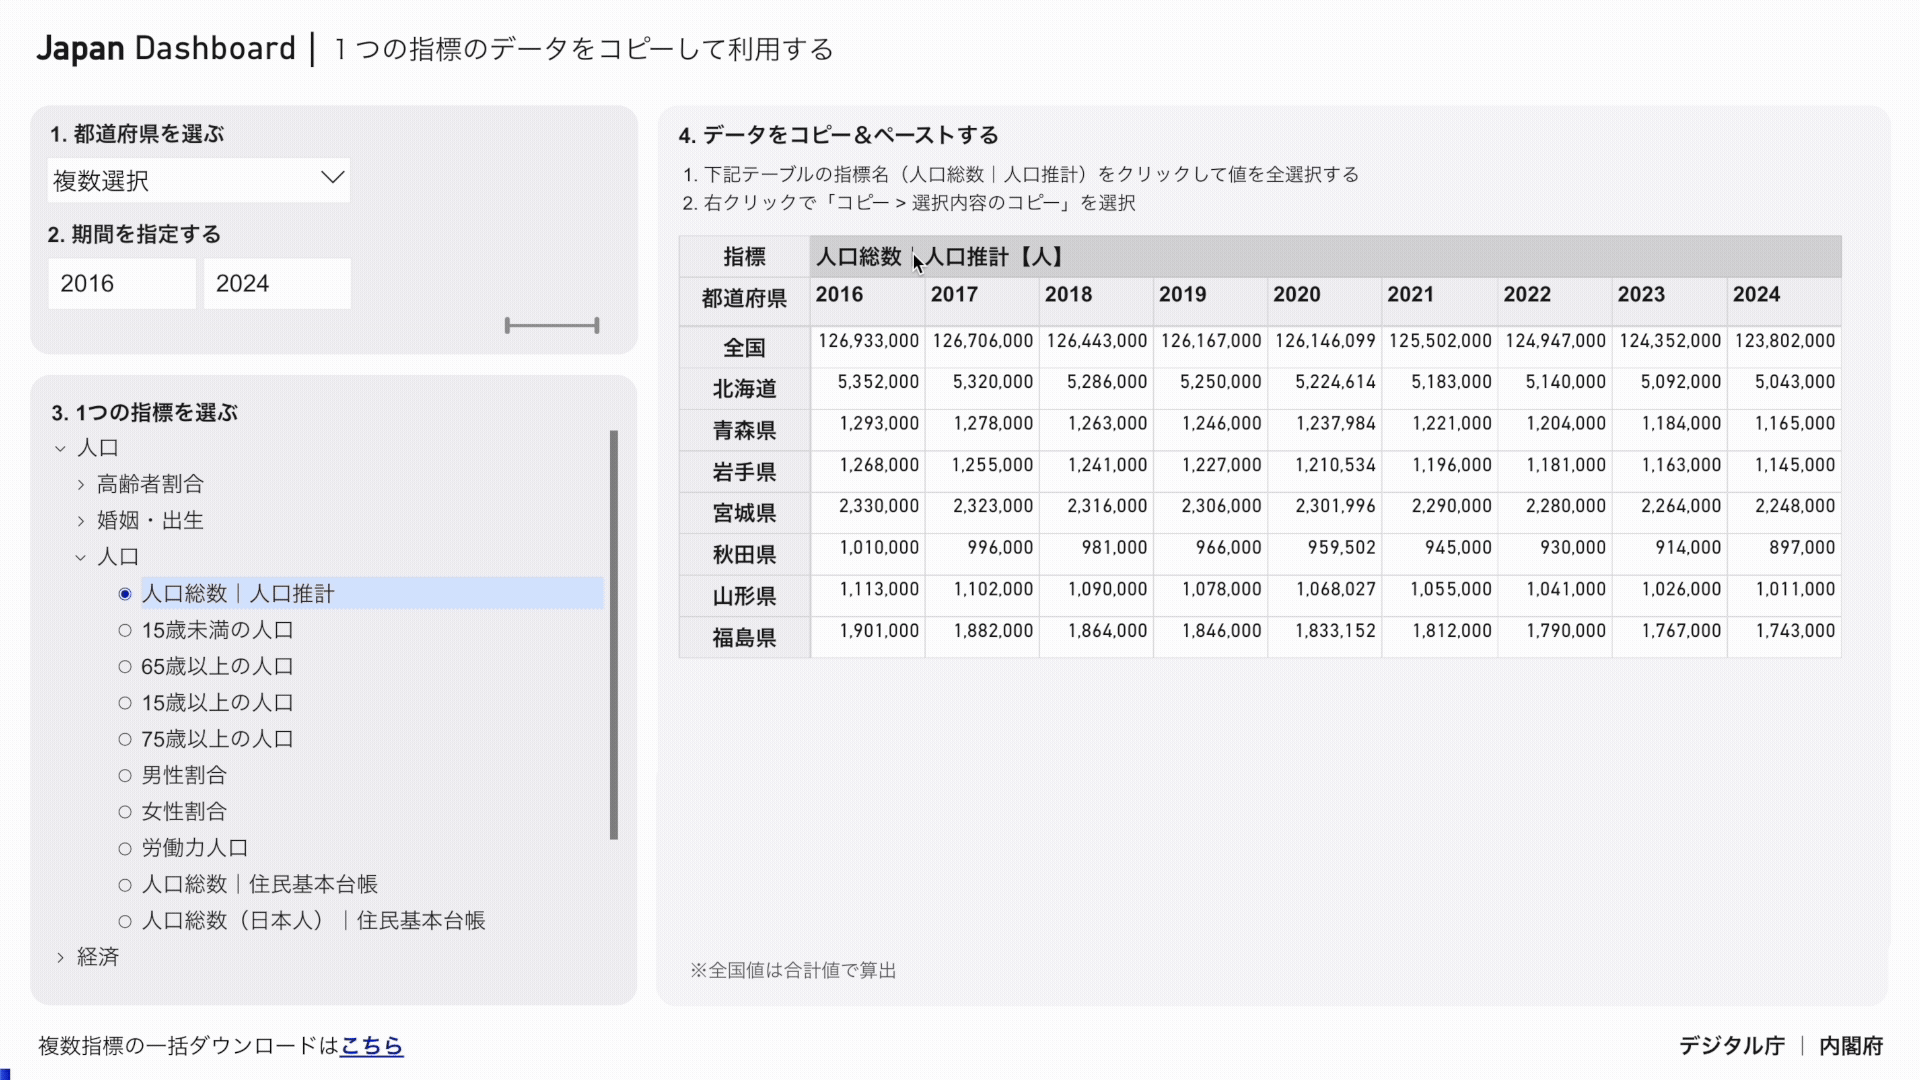
5. Copy and use data for one indicator
5.1 Setting Indicators
- In "1. Select Prefecture", "2. Specify Period", and "Select 3.1 Indicators", specify the prefecture, period, and indicator of the data to be used.

5.2 Copying Data
- Click the indicator name in the table to select all values.
- Right-click to display the menu, and then click Copy & gt; Copy Selection.
- Paste into Excel etc. and use the data.
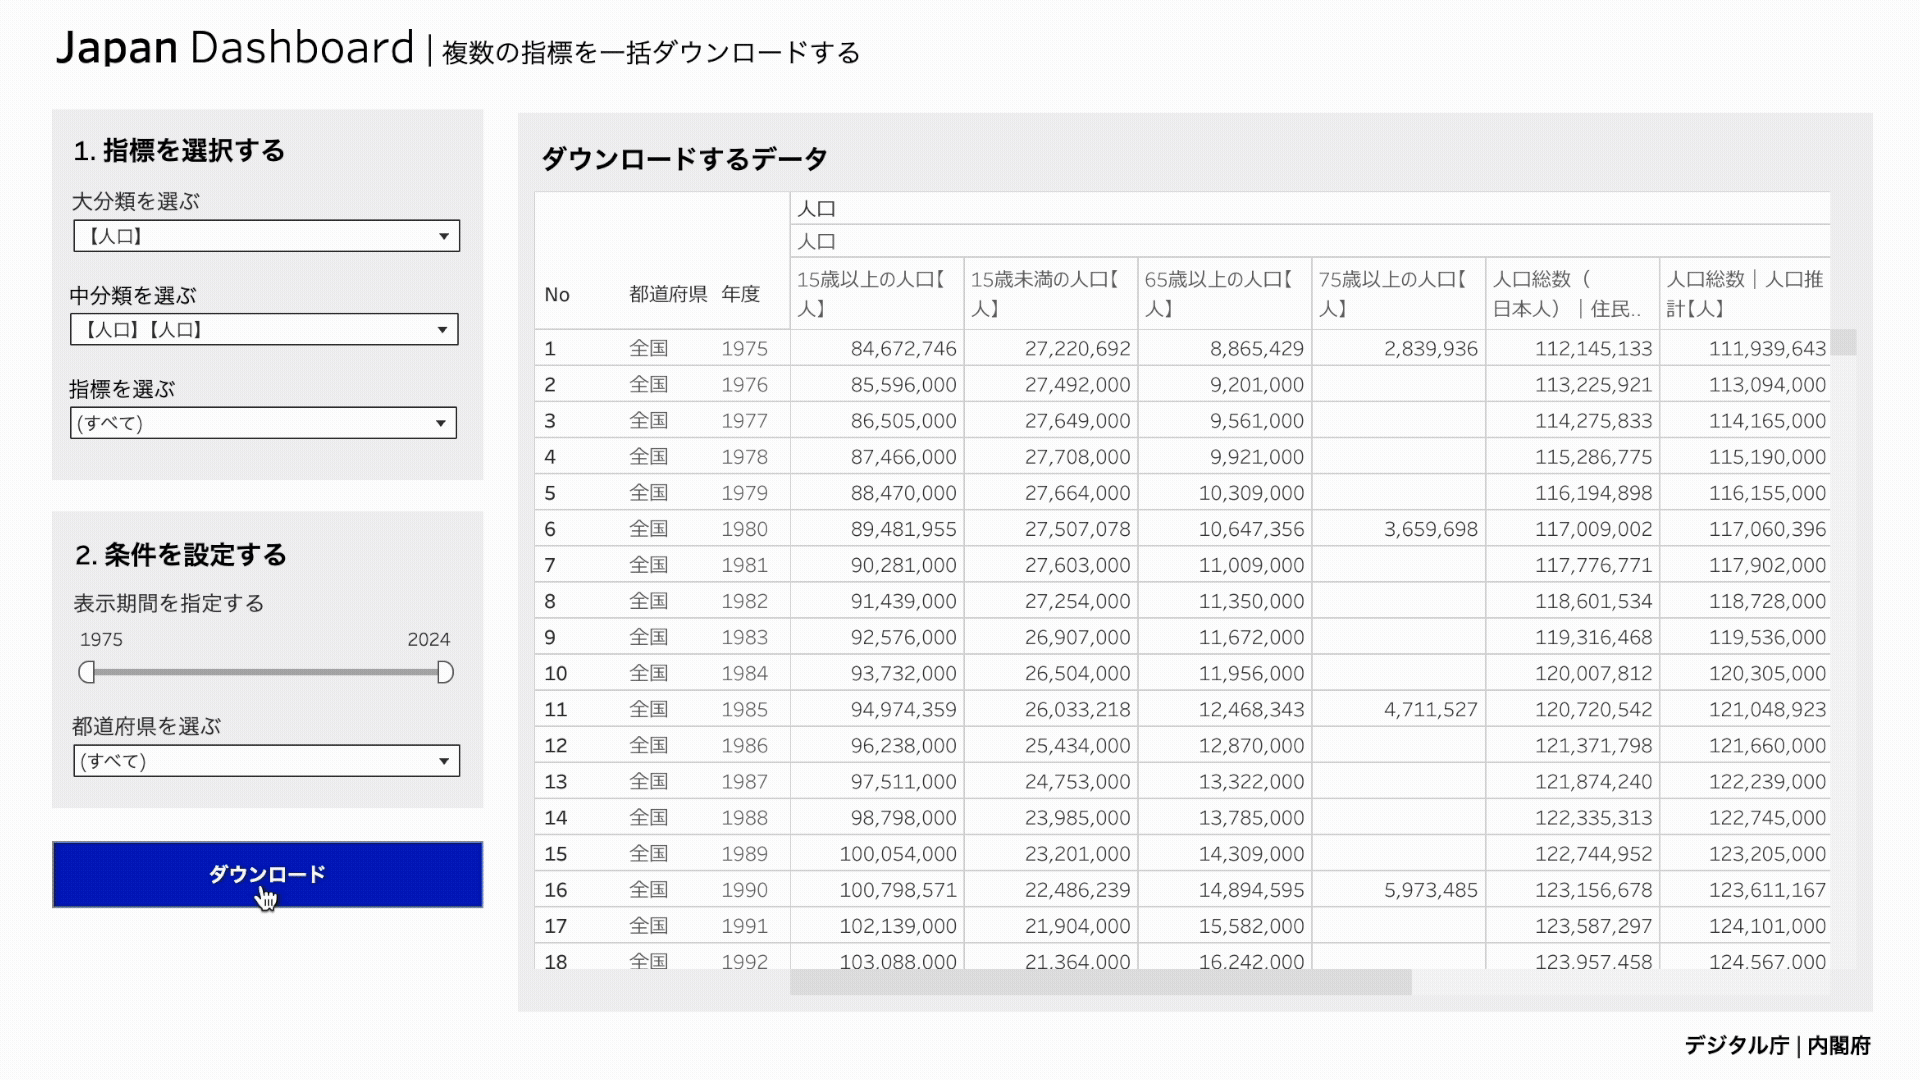
6. Bulk download multiple metrics
6.1 Setting Indicators
- Set "Major", "Minor", and "Indicator" from "1. Select indicator" on the left menu.
- From "2. Setting Conditions", specify "Period" and "Prefecture".
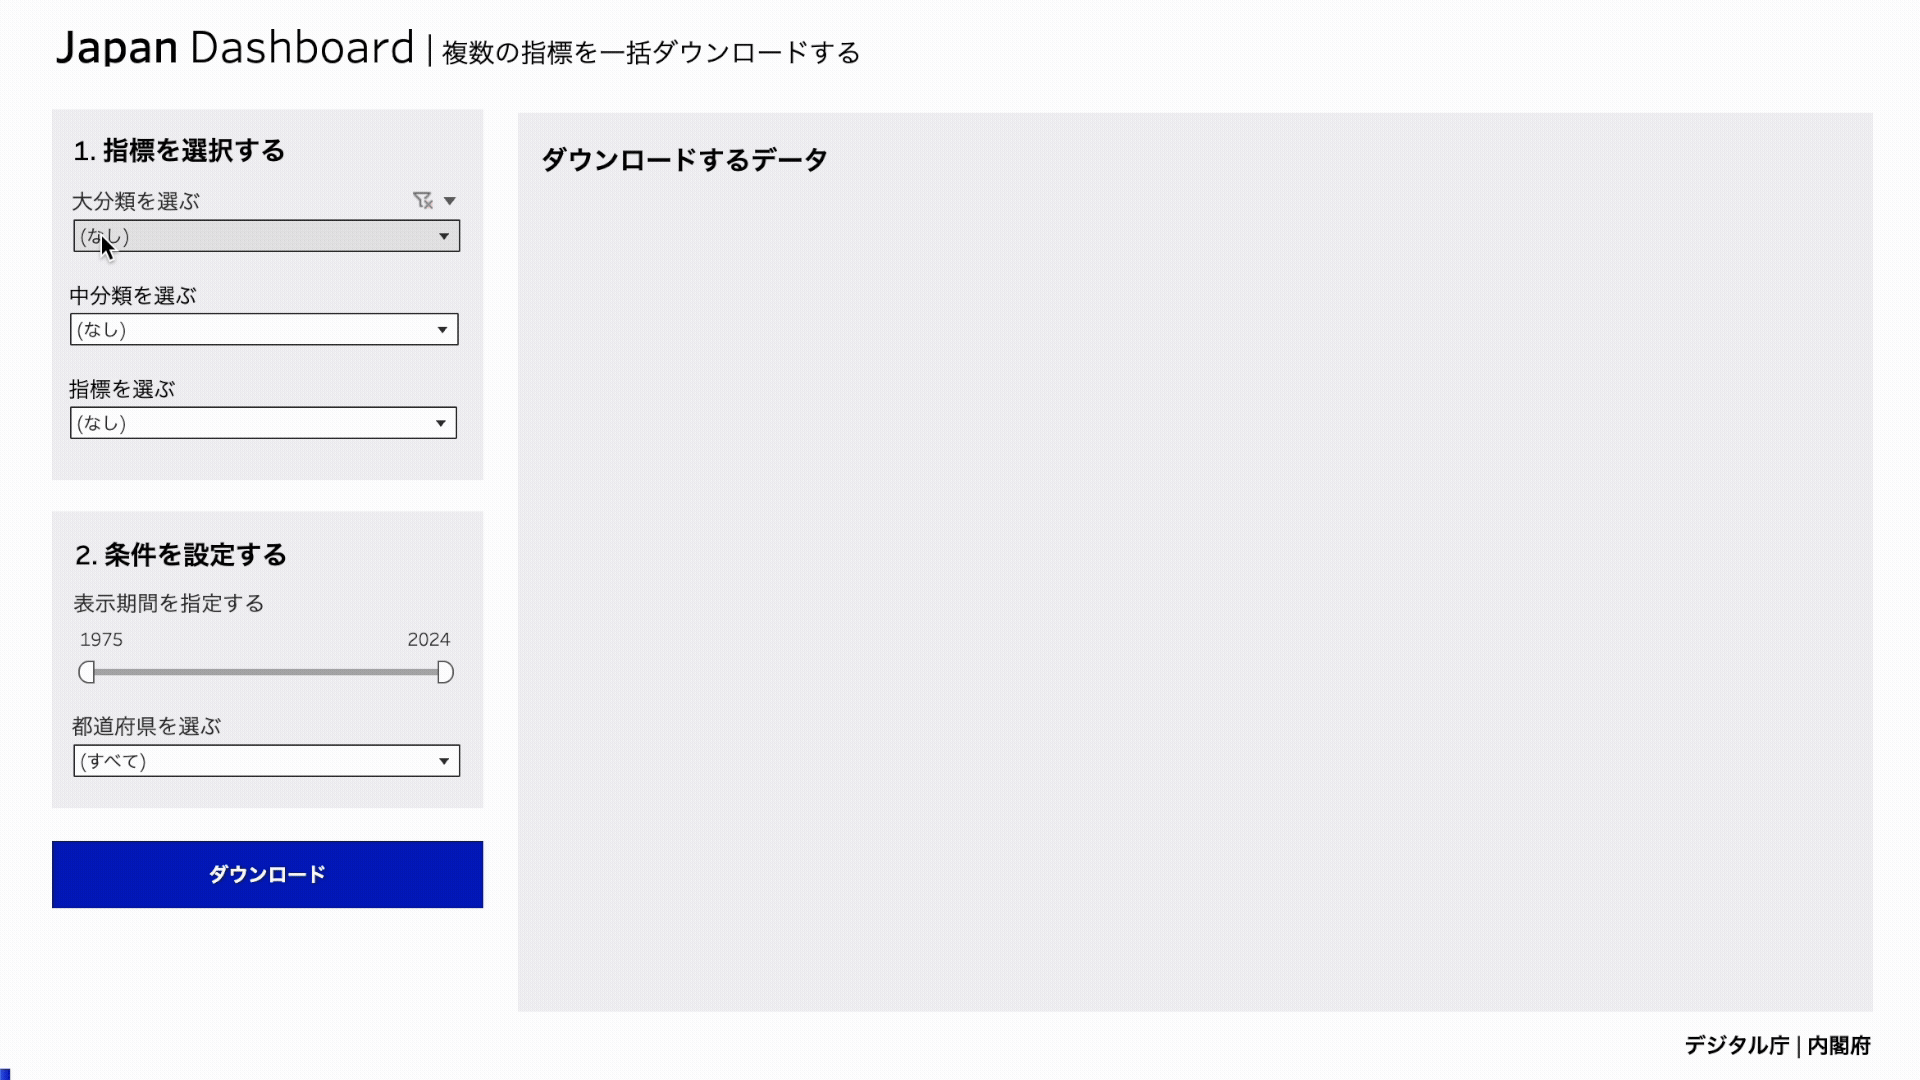
6.2 Downloading Data
- Select Download at the bottom of the menu.
- Select Data and click Download.
Contact Information
If you have any questions or ideas, please send us your opinions and requests regarding the "Japan Dashboard (Dashboard on Economy, Finance, Population and Life)" to in Cabinet Office.
Frequently Asked Questions
If you have any questions, please check Frequently Asked Questions .